

How to Fix “You Don’t Have Permission to Access on This Server” Error
If you’re wondering why your web browser displays a “You Don’t Have Permission to Access on This Server” error instead of your site or web page, you’ve come to the right place. There are a few reasons, including on both the user and server sides, that cause this problem. We’ll show you a few ways to fix the issue so you can access your desired site.
The most common reason you get the above error is that your site’s server has restricted your access to the site. Other causes include a faulty web browser, blocked VPN or proxy, corrupt web browser data, and more.
Relaunch Your Web Browser to Fix the Access Denied Error
When you get the above error, you should first close and relaunch your web browser. This fixes any minor issues with your browser which may be causing the problem.
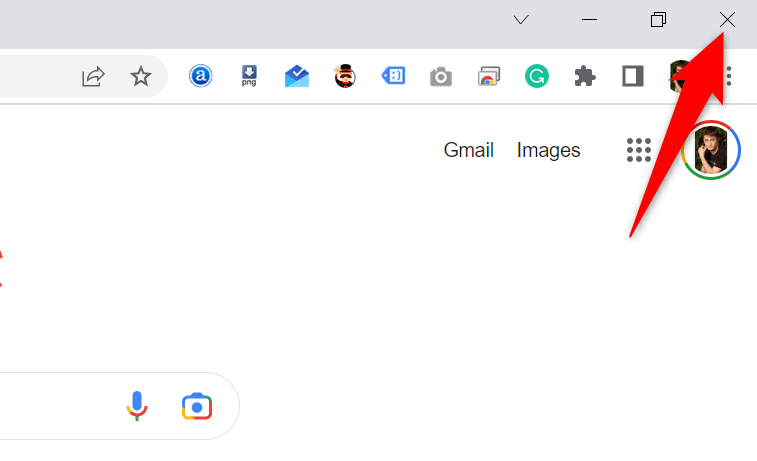
You can close a browser app on Windows by selecting X in the window’s top-right corner.
You can quit a browser on Mac by choosing the browser name and selecting Quit in the browser’s menu bar.
When you’ve done that, open your web browser and try to access your site.
Restart Your Windows or Mac Computer
If your issue persists after relaunching the browser, your Windows or Mac machine may have a minor problem. In this case, reboot your computer to fix those minor issues.
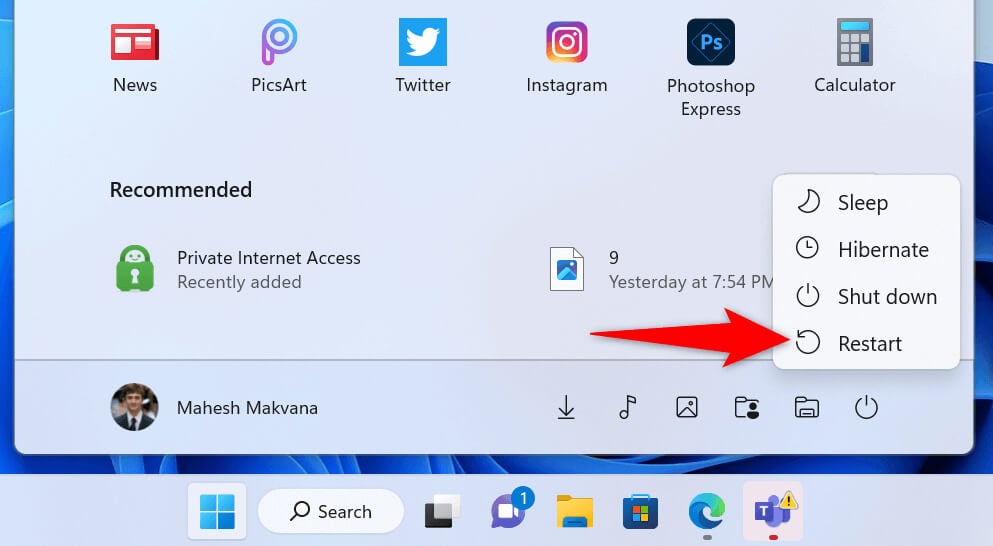
You can reboot a Windows PC by opening the Start menu, selecting the Power icon, and choosing Restart.
To reboot a Mac, open the Apple menu in your Mac’s top-left corner and choose Restart.
Launch your web browser and open your site when your machine turns back on.
Check the Site’s Web Server Issues
Your website may be experiencing an issue on its servers, causing your browser to display a “You Don’t Have Permission to Access on This Server” error. Usually, this error appears when the server restricts your access to the site, but there may be other causes.
In this case, contact the site’s webmaster for a resolution. If that’s impossible, wait until the site admin resolves the issue. You can’t do anything when the problem is on the server’s end.
Turn Off Your VPN
Your VPN app routes your internet data through a third-party server, which can be problematic sometimes. This may be why you’re experiencing the above error in your web browser.
In this case, turn off your VPN and see if your issue is resolved. You can disable your VPN software by launching your app and turning off the toggle on the main screen. Then, launch your web browser and try to access your site.
If your site opens after disabling the VPN, change your VPN region and see if that helps. Contact your VPN provider or get a new VPN app if that doesn’t work.
Disable Your Proxy Server
Like a VPN, your proxy server transmits your internet data through a third-party server. This can be problematic in some cases, like yours. You can turn off the proxy server on your Windows or Mac computer to see if that resolves the problem.
Later, you can turn your proxy server back on if you want.
On Windows
- Open Settings by pressing Windows + I.
- Select Network & internet in the left sidebar.
- Choose Proxy on the right pane.
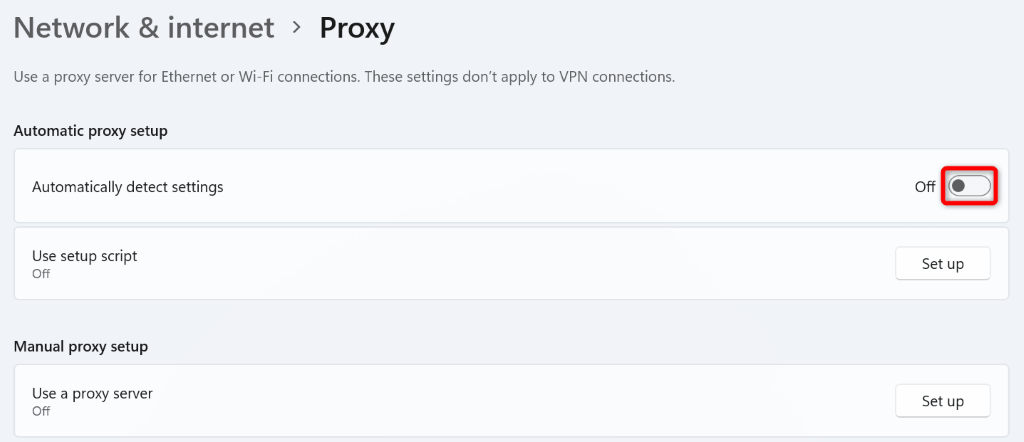
- Disable the Automatically detect settings option.
- Select Set up next to Use a proxy server.
- Turn off the Use a proxy server option and select Save at the bottom.
On macOS
- Open your Mac’s Apple menu and choose System Preferences.
- Select Network on the following page.
- Choose Wi-Fi in the left sidebar and Advanced on the right pane.
- Access the Proxies tab.
- Clear all the checkboxes in the Select a protocol to configure section and choose OK at the bottom.
Turn Off Your Windows or Mac Firewall
Your computer’s firewall ensures your outgoing and incoming network connections are safe. However, your firewall may have mistakenly recognized your connection to your site as a potential threat, blocking the connection.
In this case, disable your firewall and see if your site opens. You can turn your firewall back on later.
On Windows
- Open Start, find the Control Panel, and select the utility.
- Choose System and Security in Control Panel.
- Select Windows Defender Firewall on the following page.
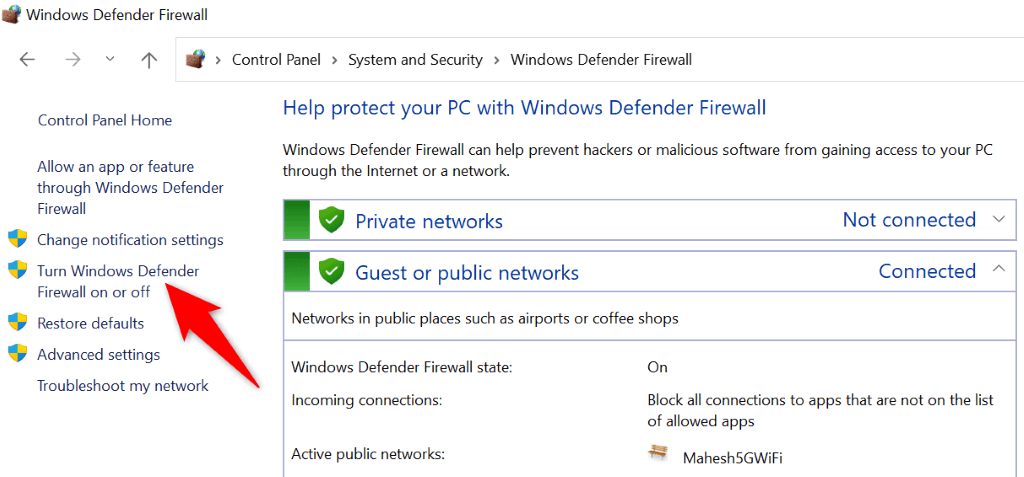
- Choose Turn Windows Defender Firewall on or off in the left sidebar.
- Enable the Turn Off Windows Defender Firewall (not recommended) option in both the Private network settings and Public network settings sections.
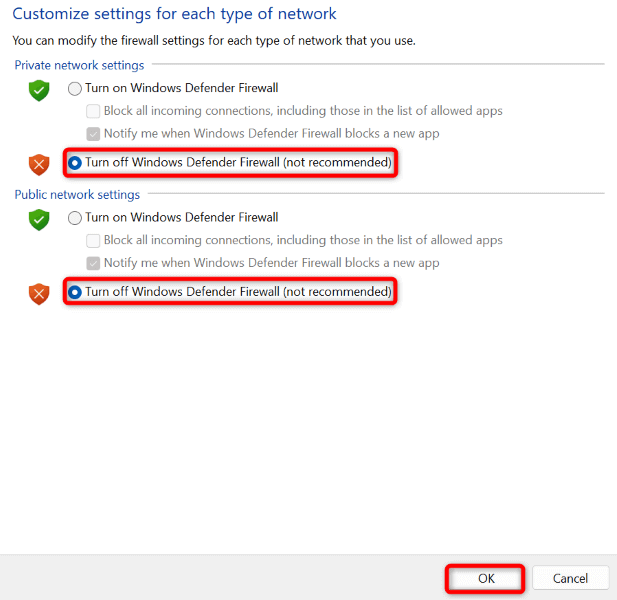
- Choose OK at the bottom.
On macOS
- Open a Terminal window on your Mac.
- Type the following command in the Terminal window and press Enter:
sudo defaults write /Library/Preferences/com.apple.alf globalstate -int 0 - Type your Mac password and press Enter. Your firewall is now disabled.
- To turn your firewall back on in the future, use the following command:
sudo defaults write /Library/Preferences/com.apple.alf globalstate -int 1
Change Your Windows or Mac’s DNS Server
Your computer’s DNS servers help web browsers translate domain names to IP addresses. These servers may be facing an outage, causing your browsers to display an error message.
In this case, you can use alternate DNS servers to resolve your issue. These servers work the same way as your original ones, causing no difference in how your internet-enabled apps work.
On Windows
- Launch Settings by pressing Windows + I.
- Select Network & internet in the left sidebar.
- Choose Wi-Fi or Ethernet, depending on your network type on the right. We’ll select Wi-Fi.
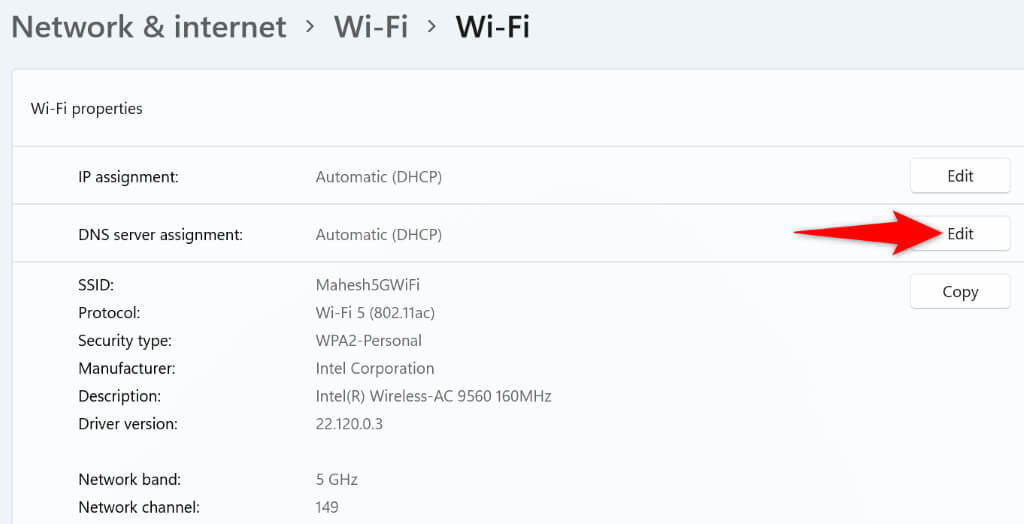
- Choose Hardware properties on the following page.
- Select Edit next to DNS server assignment.
- Select Manual from the drop-down menu and enable IPv4.
- Enter 8.8.8.8 in the Preferred DNS field and 8.8.4.4 in the Alternate DNS field.
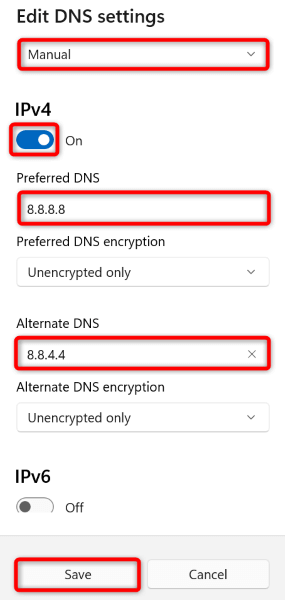
- Select Save at the bottom.
On macOS
- Open System Preferences on your Mac and select Network.
- Select your network connection on the left and choose Advanced on the right.
- Open the DNS tab, select the existing servers, and choose the – (minus) sign to remove the servers.
- Select the + (plus) sign and enter 8.8.8.8. Then, select the same sign again and enter 8.8.4.4.
- Select OK at the bottom, then choose Apply on the following screen.
Delete Your Web Browser’s Browsing History
Your web browser saves browsing data, like cookies and site data, to make it possible for you to return to your past items. Sometimes, this data goes corrupt, making your browser unstable. This may be why you’re experiencing a “You Don’t Have Permission to Access on This Server” issue in your browser app.
In this case, clear browser data, and your issue will be fixed.
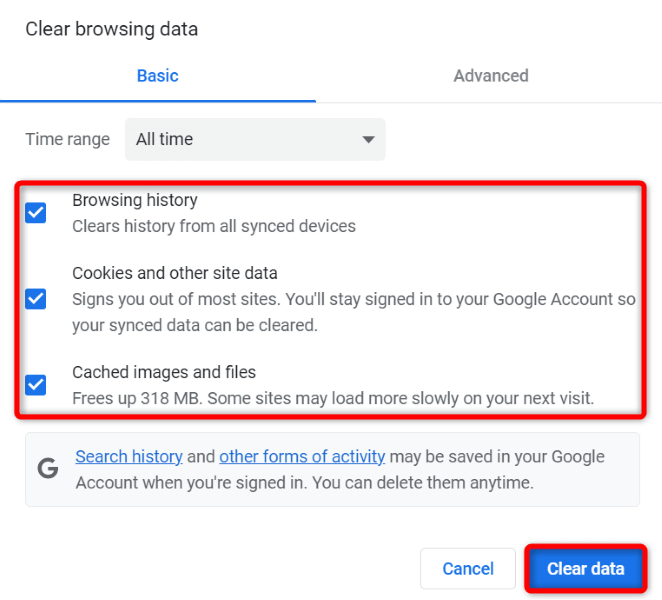
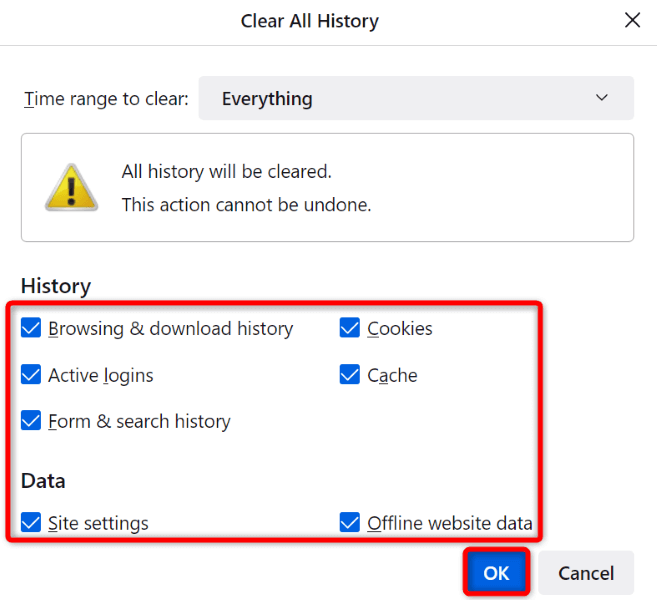
If you’re a Google Chrome user, open your browser’s Settings window and choose Privacy and security > Clear browsing data. Next, select the items to delete and choose the Clear data button.
Launch Settings in the Firefox browser and select Privacy & Security > Clear History. Choose the items to delete and select OK.
On Microsoft Edge, open the Settings menu and select Privacy, search, and services > Choose what to clear. Select the items to delete and choose Clear now.

And you’ve successfully cleared your browser cache, cookies, and other items.
Reset Settings in Your Web Browser to Original Defaults
If your issue remains unresolved, bring your web browser to the factory settings, fixing issues with the app’s configuration. You or someone else may have incorrectly customized a setting option in your web browser, causing the app to display an error message.
We’ve already written a guide on how to reset various web browsers, so access that guide and follow the instructions for your browser. Note that you’ll lose all your saved data in your web browser when resetting.
Opening Inaccessible Sites in Your Windows and Mac Web Browsers
Your Windows and Mac web browsers display a “You Don’t Have Permission to Access on This Server” for various reasons. As long as the issue isn’t created on the server end, you can use the above methods to resolve your problem.
Once you’ve fixed the item causing the issue, your site or web page will open just as it should, allowing you to continue browsing.