

Is the Windows Start Button Not Working? Here’s How to Fix It
The Start Menu has been a central part of Windows since Windows 95. Because of its inclusion in almost every Windows version, it’s sorely missed when it decides to stop working.
Fortunately, there are more than a few ways to get the Start Menu button working again if it quits on you.
1. Update Windows
One of the easiest ways to resolve issues plaguing Windows 10 is to update it. Microsoft constantly pushes out patches, new features, and improvements to Windows with big updates every year and smaller security updates in between.
Whenever you find something that isn’t working as it should, your first intuition should be to check for and perform a Windows update.
So, press the Windows key, write “Updates”, and choose Check for updates from the options. Let the system check for and download updates if there are some available.
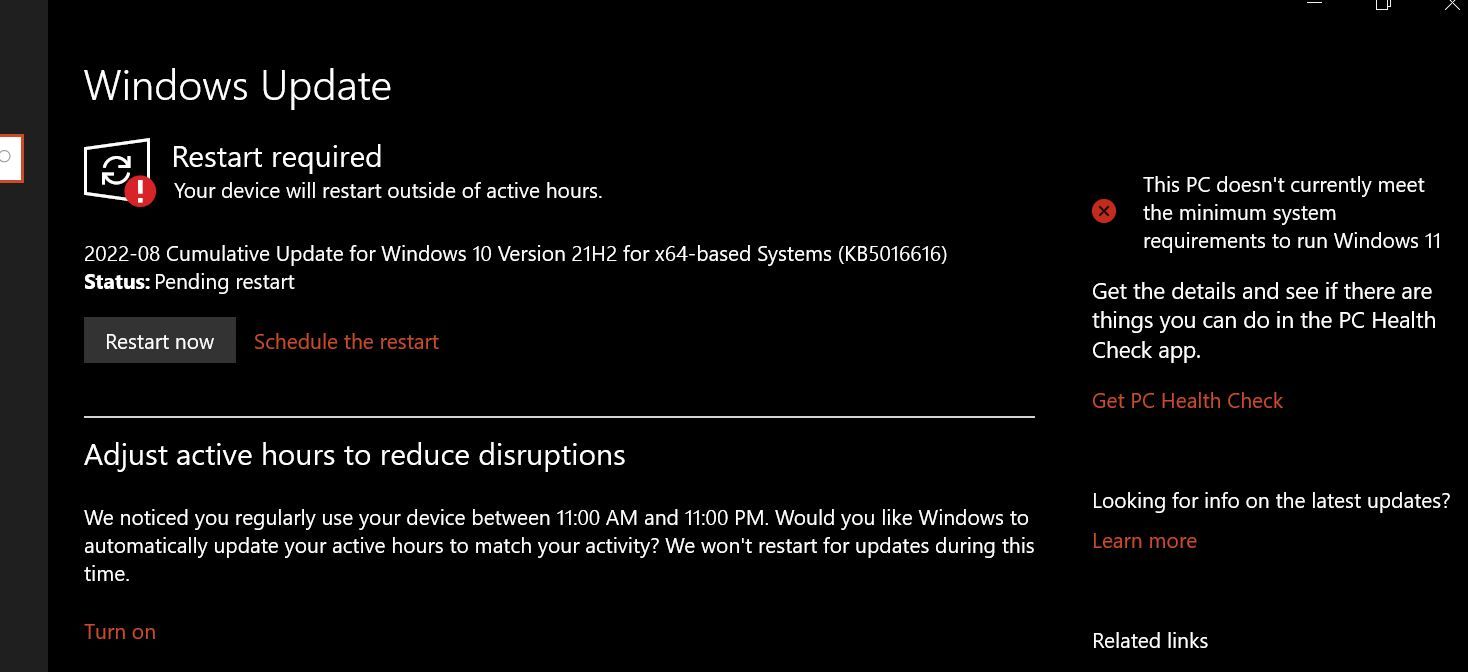
Finally, finalize the update by restarting your computer. This will hopefully fix the issue.
2. Sign Out of Your User Account
After performing a Windows update, signing out and in again into your user account is the next quickest possible way to fix the Start Menu.
To sign out of your PC:
- Hit Win + X to bring up the Windows Power User Menu.
- From the menu, click on Sign out.
- Wait a few seconds after signing out and sign back in.
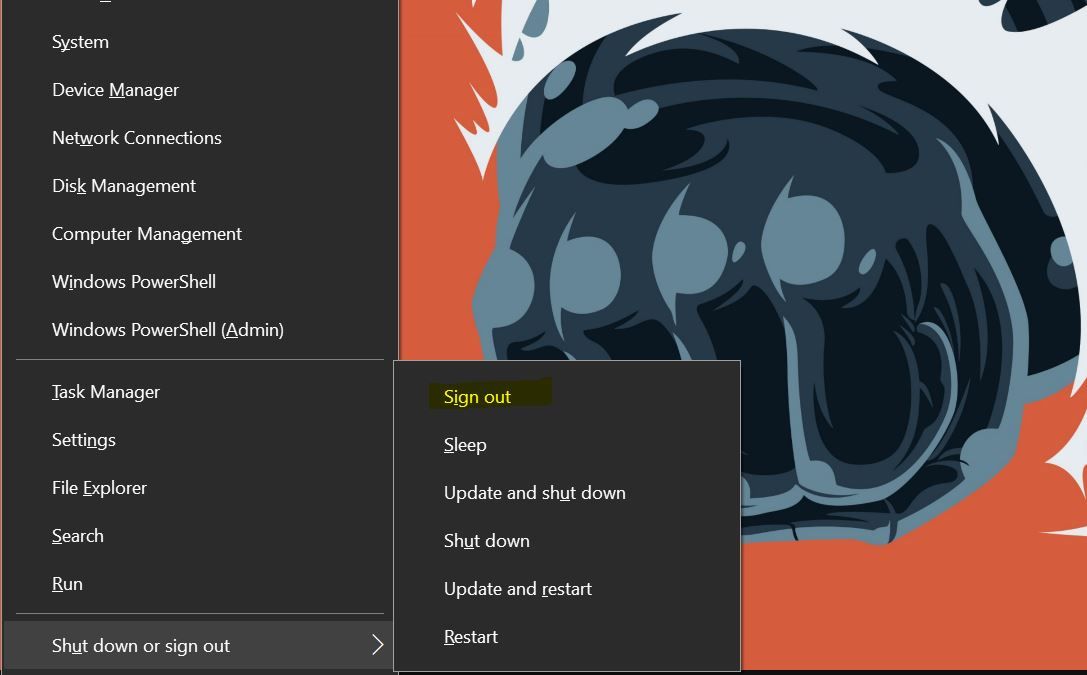
Although this is a sort of hack and not a “solid” solution, this simple trick can save you from having to take more drastic measures like editing the registry entries or restarting Windows Explorer.
3. Restart Windows Explorer
Windows Explorer is Windows’ default file manager. Microsoft first introduced Window Explorer in Windows 95. Explorer allows you to see, interact with, and modify files present on your system.
Start Menu Button sometimes stops working because of issues with Windows Explorer. Simply restarting Explorer can often resolve problems affecting the Start Menu and the Taskbar.
To restart Explorer:
- Hit Ctrl + Shift + Esc to open Task Manager.
- Under the Processes tab, right-click Windows Explorer and click Restart.
- Wait for the Explorer to boot up.
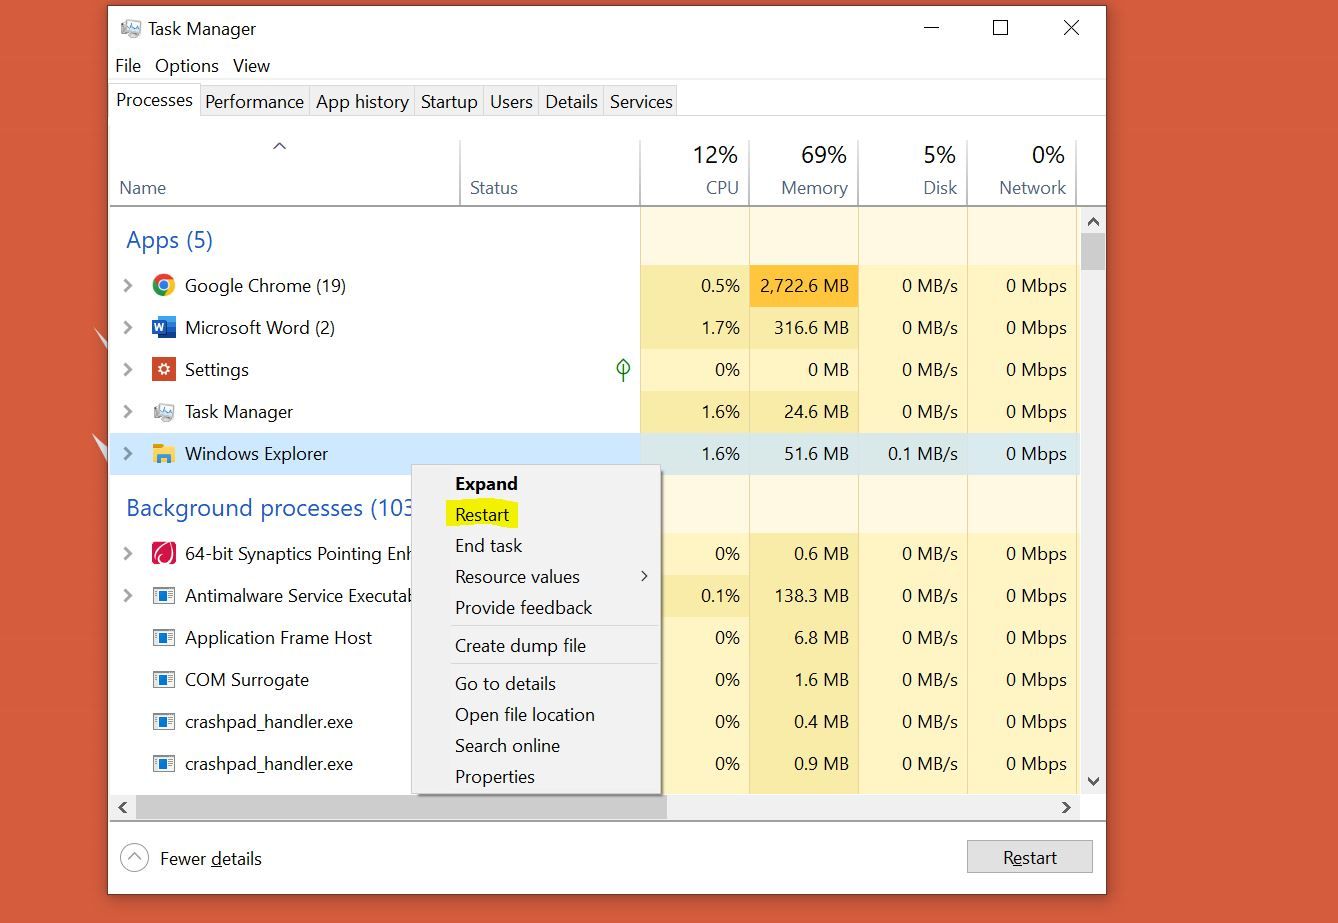
When you restart Windows Explorer, the Explorer application will quit, causing the GUI that sits on top of the file system to disappear momentarily. So, don’t worry if you see everything go blank for a sec.
4. Perform a System File Checker Scan
Corrupt system files causing unforeseen problems are an issue as old as Windows itself. As you can expect, such files can also affect the Start Menu and cause it to stop working.
Fortunately, Windows 10 has built-in file repair tools that can fix most problems concerning corrupt system files. The System File Checker (SFC) is one such tool.
Start the Command Prompt with administrative privileges. To do this:
- Hit Win + S, type “Command”, right-click on Command Prompt, and choose Run as administrator.
- In the Command Prompt window, type “SFC /scannow” and press enter.
- Wait until the utility performs a scan.
If Windows doesn’t find any integrity violations, there was no problem with the files. However, if Windows does find issues but couldn’t resolve them, you may need to perform additional scans. Here is a detailed guide on the Windows built-in file system repair tools that’ll help you do just that.
5. Re-register the Built-in Windows Apps Using PowerShell
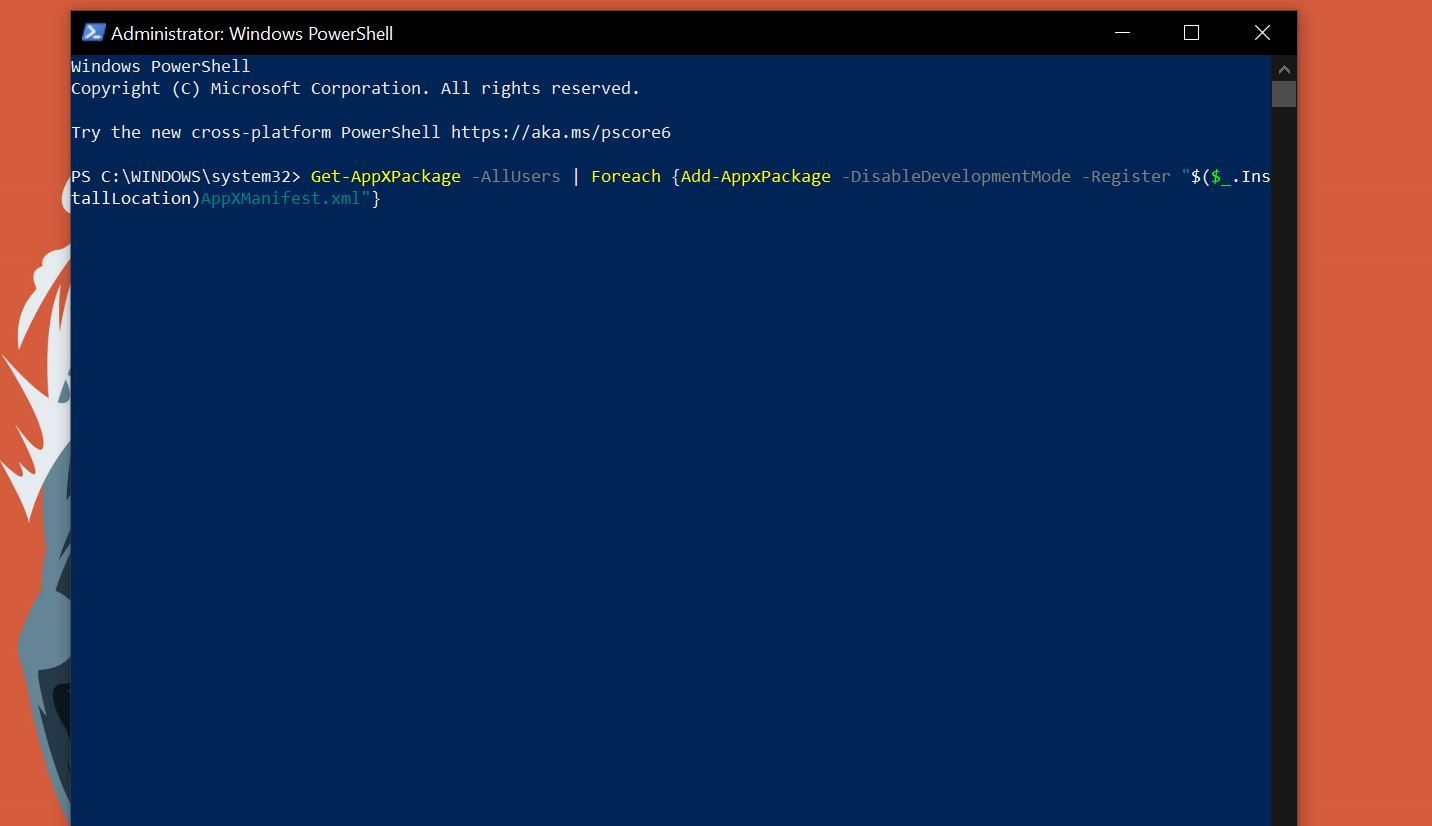
A temporary workaround when the Start Menu button is not working is to re-register the app using Windows PowerShell. But, before you pull the trigger, remember that you may need to repeat the process if the problem persists in the future.
- Press Wins + S to bring up the search bar and type “Powershell”.
- Right-click on Windows PowerShell and hit Run as administrator.
- In PowerShell, paste this command and hit enter: Get-AppXPackage -AllUsers | Foreach Add-AppxPackage -DisableDevelopmentMode -Register “$($_.InstallLocation)AppXManifest.xml”
6. Disable Temporary Cortana Files With the Command Prompt
One of the biggest changes that Microsoft made to Windows 10 was to integrate Cortana into the OS. Cortana was Microsoft’s take on a smart voice assistant. But it fell short of its goal and a lot of people choose to disable Cortana.
Unfortunately, Cortana can often cause Windows Explorer to misbehave. So, deleting and rebuilding temporary Cortana files can go a long way in fixing Explorer issues, including the Start Menu button not working.
- Press Win + S and type “Command Prompt”.
- From the options, right-click on Command Prompt and select Run as administrator.
Once Command Prompt starts, run the following commands in order:
- CD/d “{5376dfc28cf0a7990a1dde1ec4d231557d3d9e6448247a9e5e61bb9e48b1de73}LOCALAPPDATA{5376dfc28cf0a7990a1dde1ec4d231557d3d9e6448247a9e5e61bb9e48b1de73}PackagesMicrosoft.Windows.Cortana_cw5n1h2txyewy”
- Taskkill /F /IM SearchUI.exe
- RD /S /Q Settings
If these commands don’t work, you have a few more options at your disposal so follow along.
7. Boot Into Safe Mode
If you really need the Start Menu button to work and don’t mind losing access to third-party applications, booting into Safe Mode can be an excellent way to get the Start Menu back.
For the uninitiated, Safe mode is a Windows tool that disables unnecessary drivers and programs to boot the computer in a pristine state with basic programs. In such a bare-bones environment, users can troubleshoot issues by focusing on the root causes without worrying about user applications messing things up.
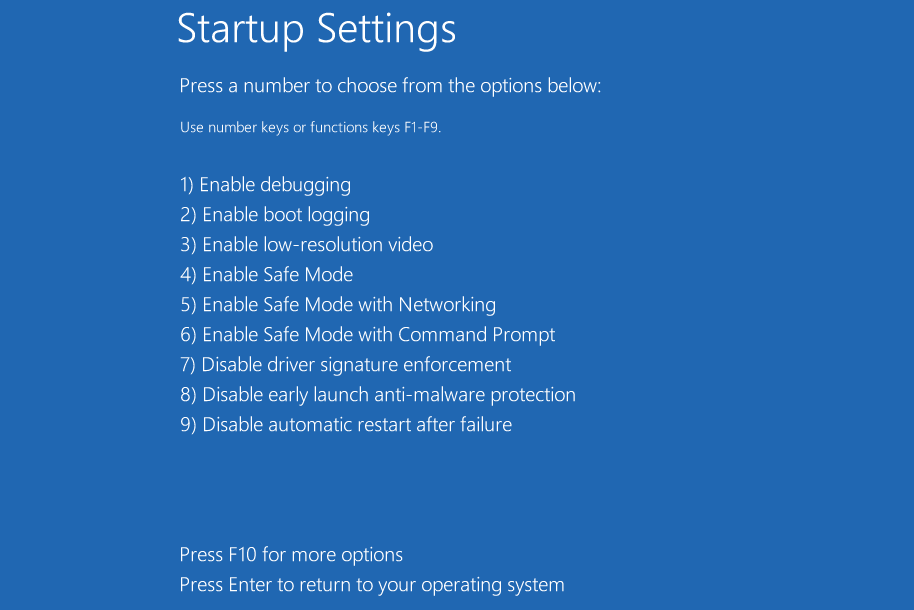
So, boot into Safe Mode and see if it fixes the Start Menu.
8. Perform a System Restore or Factory Reset
If none of these solutions work it would mean that one of Windows’ core functions is causing the Start Menu to misbehave. In that case, you may need to restore or factory reset Windows to get it working again.
Hopefully, the above methods have helped you get your Start menu back. Remember; if you’re planning to do a full reset of your PC to fix the issue, make a backup of your computer so you can put everything back once you’re done.