

How to speed up your computer
Windows computers can be complicated and challenging for the average user to keep running smoothly at all times, but it’s not impossible. Multiple variables at play can ruin your user experience and system performance, making it sometimes tricky to pinpoint precisely what’s happening. For example, junk files cluttering your internal storage can build up over time and slow things down. You can also have a system infection or virus on top of that, adding yet another layer of problems. This guide will take you through some of the most common troubleshooting steps for computer slowdown.
Check for and install important Windows updates
Keeping Windows updated is often the first step in fixing computer slowdown since they can directly fix specific issues. It mostly takes care of itself; however, you might have some updates waiting to be installed depending on your settings. Optional updates may pop up occasionally, but you can skip those as needed and grab the critical ones first. To manually check if you have any Windows updates ready to install, you can do the following:
- Open Settings → Update & Security.
- Click on Windows Update to view the main screen that shows when your computer was last checked for an update.
- Click on the Check for updates button to see if you have any updates that need to be installed.
- Install any available updates, then reboot your device when requested if the restart prompt pops up afterward.

Microsoft also releases a security update every second Tuesday of each month, known by many as Patch Tuesday. These patches can also play a key role in keeping your computer running smoothly by helping to minimize security threats.
Update your system device drivers
Like installing the latest Windows updates for your computer, ensuring your device drivers are up-to-date can help your overall system performance. Drivers are what tell your mouse and keyboard, for example, how to communicate with the Windows operating system. If something were to go wrong, weird issues could pop up — some can cause your computer to lag or even crash. Device manufacturers often release official driver updates to fix bugs and optimize system performance. Installing the latest drivers can be a good idea to help keep your computer running better for longer.
You’d first want to do a quick Windows Update scan to see if you have any driver updates available to install. If nothing else, you can manually check for updates just to be sure. For pre-built PCs, visit the manufacturer’s support website and enter the model to find your drivers. The motherboard support site should have the drivers you need for custom-built PCs. You can even use a third-party tool to automate the process, taking out the guesswork. Driver Booster is a solid choice if you want to go that route instead of manually hunting for updates.

Often overlooked, you should also grab the latest BIOS update for your motherboard while checking for driver updates. The BIOS is crucial since it communicates with the hardware on the motherboard to initiate the boot process. You’d want to keep it up to date since it can also bring security patches, bug fixes, and system performance optimizations.
Remove unwanted startup programs or apps
If you have multiple programs and apps installed on your computer, some of them might actually be slowing you down. Many programs will automatically start when you turn the computer on each time, which you may be completely unaware of. As you can imagine, that list can get quite large the more you install over time. As a general rule of thumb, you’d want as few programs and apps starting up with your computer as possible. Doing so will not only speed up your overall boot times, but it’ll also save system resources.
The easiest way to do this is using the good old Task Manager, which can be very helpful when troubleshooting many Windows-related issues. To quickly remove startup items from your computer, you can do the following:
- Press the Ctrl + Alt + Del key combination, then click on Task Manager.
- You can also use Ctrl + Shift + Esc to directly bring up the Task Manager for even faster access.
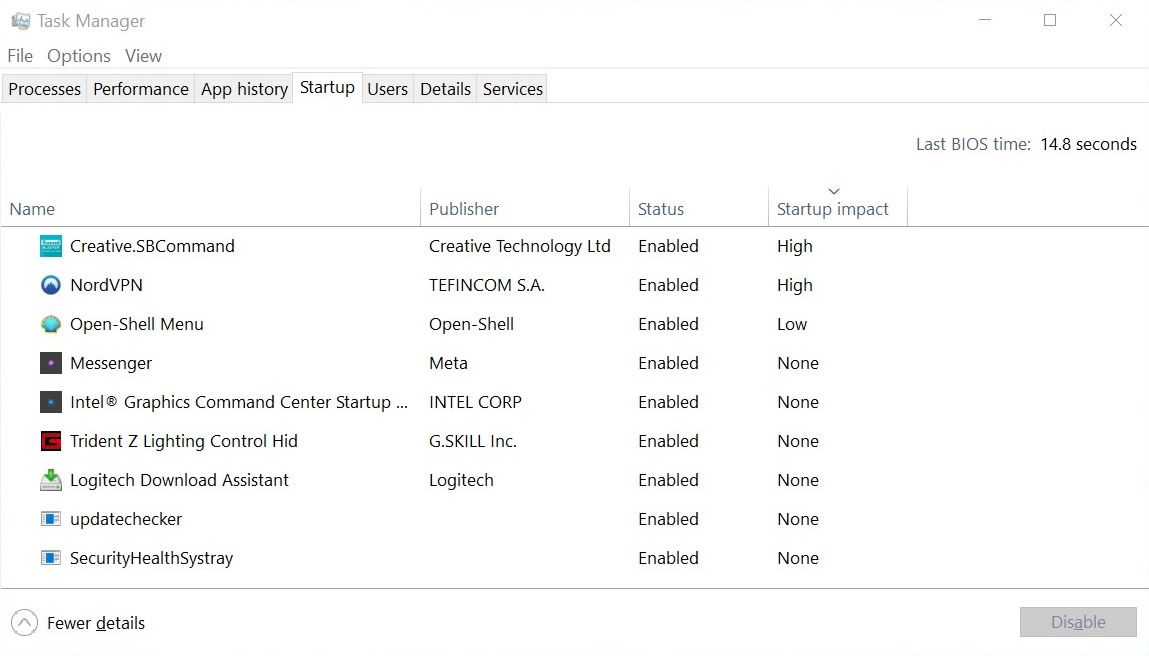
- Click on the Startup tab to view all the programs and apps that launch when you boot your computer.
- Hit the More details arrow if needed to expand the list.
- Check the Startup impact section for High and Medium level entries and disable them as necessary.
- Even if a program or app shows a Startup impact status of None or Unmeasured, you should remove anything you don’t want or use just to be safe.
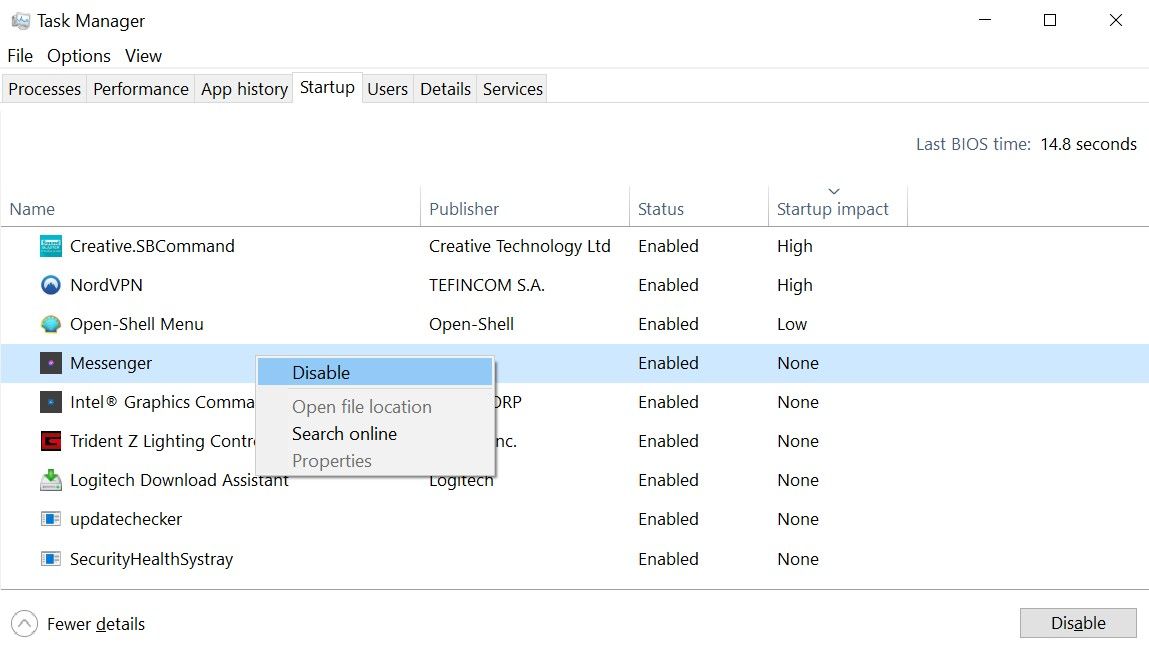
- Right-click an item on the list and hit the Disable option, or simply hit the Disable button at the bottom right.
- Reboot your computer when you’re finished disabling the startup programs or apps, and you’ll be all set here.
In Windows 10 and above, you can also find the more modern version of this Task Manager tool in Settings → Apps → Startup.
Completely uninstall unwanted programs or apps
You may have more programs and apps installed on your computer than you know what to do with. And whether you use them or not, these programs can stay running in the background without your knowledge. This can hog system resources and potentially lead to a complete bog down, especially regarding overall CPU utilization. You could use the previous tip and disable the startup entry, but that may not always work in all situations. In this case, the best thing to do would be to remove the culprit entirely, especially if you don’t need it.
If you want to quickly remove a program or app from your computer, you can check out the following steps:
- Open Settings → Apps to find everything currently installed on your system.
- Scroll through the list, click on a program or app you want to remove, then hit Uninstall.
- Follow any on-screen instructions to uninstall the item as needed; then, it’ll be removed from your computer.
- Keep doing this with the remaining programs or apps, and clear out everything you don’t want or need.

Removing these programs or apps entirely will recover storage space, take them off your startup list if necessary, and keep them from running in the background for good. Should you wish to use a third-party solution instead, IObit Uninstaller is a great choice that allows you to bulk uninstall your programs and apps. This means you can check off all the items you want to remove at once, saving you some extra clicks in the long run.
Check for viruses or other potential infections
Your computer constantly faces potential malware, viruses, and other infections when casually browsing the web. These infections can slow your system down to a crawl, while others will try to siphon the data from your computer. And with thousands of new cases every day, tackling them is quite challenging without the proper defense. Thankfully, Windows has a solid set of tools and features to help keep you safer whenever you go online. Some great examples include monthly security updates, built-in virus protection, and a firewall to monitor all network activity in real-time.
To quickly check out the overview of your system security, you can follow the steps below:
- Open Settings → Update & Security → Windows Security.
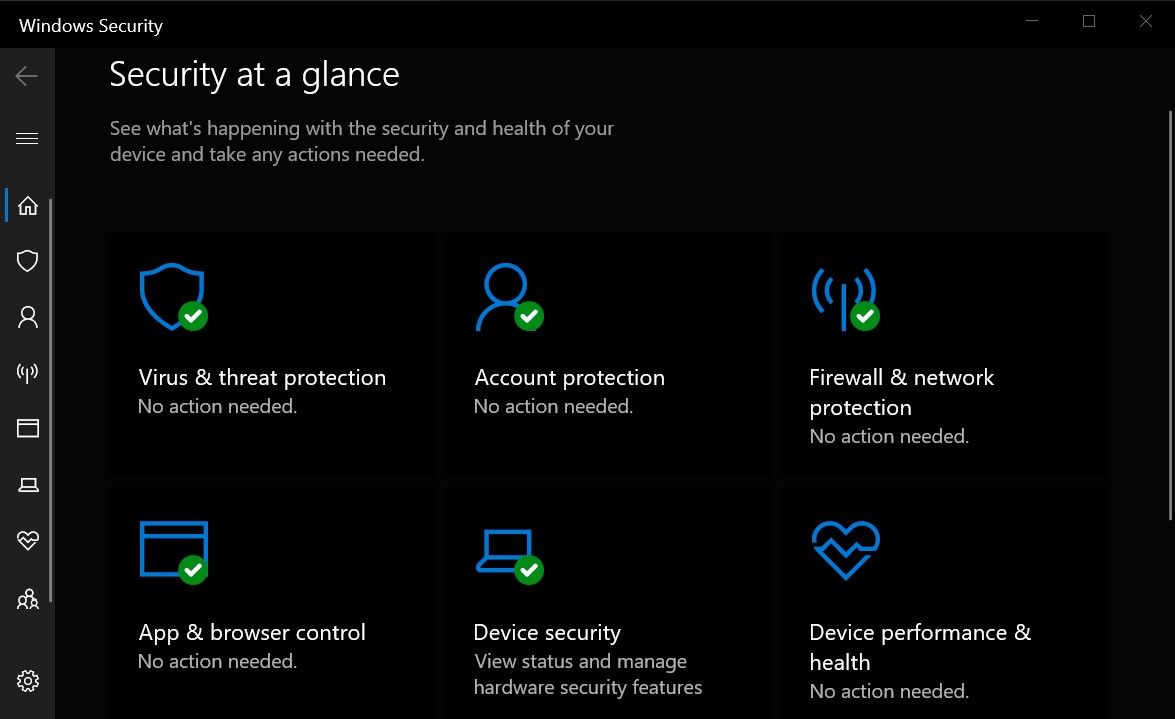
- Click the Open Windows Security button to directly launch the app on your device.
- Make sure you see all green checkmarks with the No action needed status, which means you’re good to go here.
- If you aren’t protected, or something needs your attention, click on the section and follow the on-screen steps.
- Once everything has all the green checkmarks, you can feel better now that your computer is fully protected.
The built-in Windows security tools do a great job protecting your system as long as they’re all enabled and working. Of course, you can also opt for a third-party security suite, such as Bitdefender, if you want more control and features. However, since these programs must be running at all times, occasional system slowdown or bugs can potentially occur on some computers. You can also expect a slight setup process when using a third-party security solution, which is used to learn your computer usage behaviors.
Clear junk files or cache from your device storage
Your computer will accumulate junk and temporary files that can potentially slow down your system. It takes time for them to build up, but it gets much worse as you install more programs and apps. Cached files, for example, are essential for helping to load things faster; however, the amount of storage space can get quite large if left unchecked. The best thing to do here is to navigate to the storage device you have Windows installed. By default, in many cases, it’ll often be the C: drive found within the This PC screen.
To clean up the junk files from your computer with ease, you can do the following:
- Open the context menu for your Windows drive by right-clicking, then going to Properties.
- Click the Disk Cleanup button, check all the boxes you want to remove from your system, then click OK.
- Select the Delete Files option to remove them and free up extra space on your internal storage device.

You can even choose a third-party alternative here; however, many of these tools can also clean the registry by default. Most will advise against using registry cleaners on your computer since it can cause other issues over time. If you want to use a third-party program to clean junk files and system cache, just disable any registry cleaner settings before scanning to be safe.
Optimize or upgrade your Windows OS storage device
The storage device that Windows is installed on can significantly affect how well your computer performs. Since data is sent to and from the internal storage, you don’t want any hiccups interrupting the flow of information. Many older computers still have old clunky hard drives that need to be defragged to keep things running smooth. Modern SSDs don’t go through this process; however, they still get optimized using a similar approach. No matter what, properly maintaining your storage device should help keep your system performance in check well into the future.
To defrag or optimize your internal storage device, you can check out the following steps:
- Open the This PC screen, right-click on your Windows drive, then go to Properties.
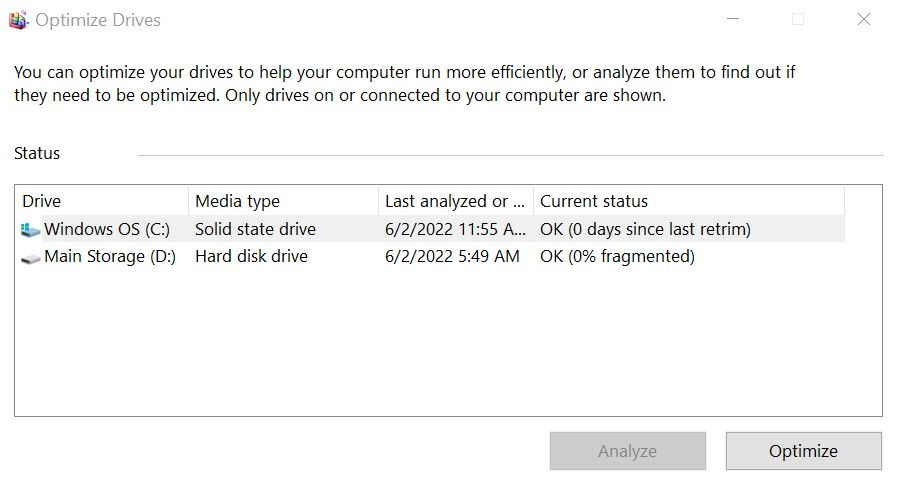
- Click on the Tools tabs and press the Optimize button to view a list of your storage devices.
- You may already see a weekly schedule that shows it was recently optimized and doesn’t require any action.
- It will typically take care of itself in the background if you have a schedule set up, making it even easier to deal with.
- It will typically take care of itself in the background if you have a schedule set up, making it even easier to deal with.
- If needed, you can still manually press the Optimize button to get started right away.
You can also consider upgrading your computer with an internal SSD if you still have an old, slow hard drive. Just doing that one thing alone might be the answer to your slowdown, especially if the hard drive is starting to fail. If your computer isn’t very new, you’d likely be looking at a SATA-based SSD; otherwise, an M.2 SSD is the way to go if your motherboard supports it.
With your internal storage situation taken care of now, you might be looking to transfer files from your Android phone to your Windows PC. Our guide shows you how to do this with some of the easiest methods possible. There might even be a few options on the list that you weren’t aware of and could try in the future.
Factory reset your computer if all else fails
Sometimes you might have a mess on your hands from junk accumulation, missing system files, or multiple infections. All of these combined can hurt your overall performance and user experience. If nothing else seems to work and you’ve tried everything, an old-fashioned factory reset might be the only answer. In this case, resetting your Windows computer is often faster than trying to isolate and fix all the problems yourself. Of course, this is the last resort option, but one that has worked in the past and still does today.
If you’re looking to factory reset your computer, you can follow the steps below to get that taken care of:
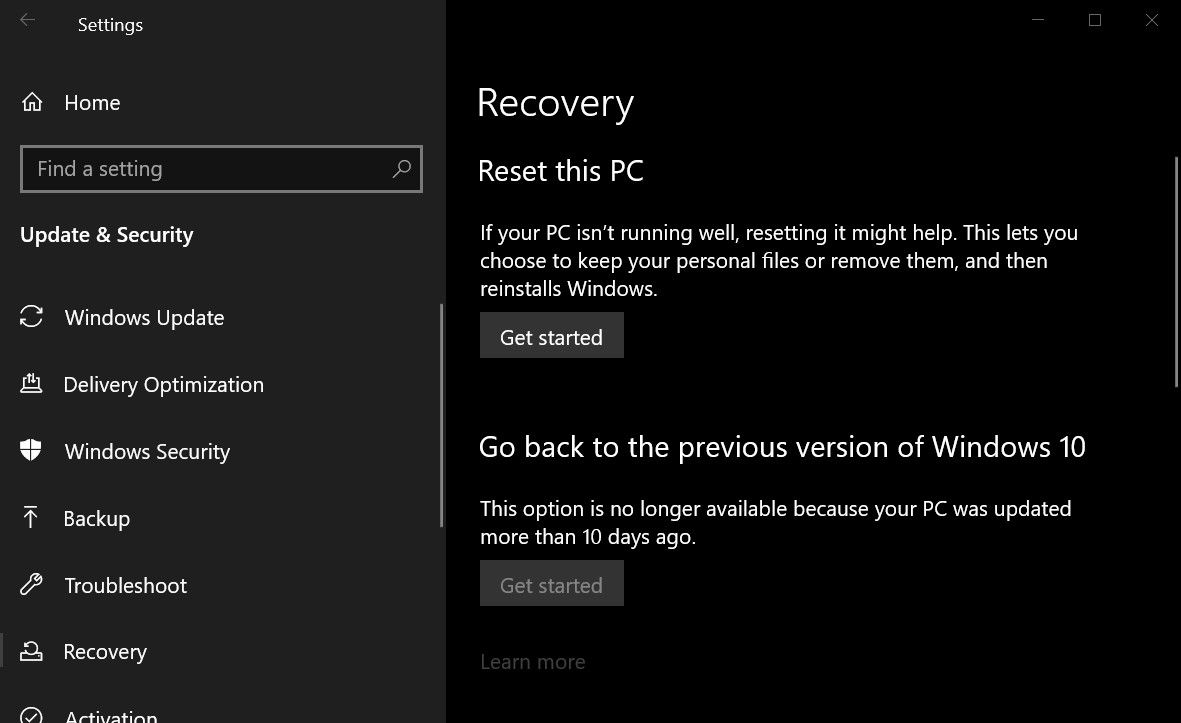
- Go to Settings → Update & Security → Recovery.
- Click the Get Started button under the Reset this PC section to continue.
- Choose the Keep my files option for a quick fix or Remove everything to start completely fresh.
- Follow the on-screen instructions, and you’ll have a clean Windows installation to start over with once it’s finished.
- If all is well, this should take care of whatever issue you had that caused you to do a factory reset in the first place.

After cleaning up and optimizing everything, you might think about linking your Android phone with your Windows PC. This allows you to check your messages, view notifications, and make phone calls directly from your computer. Our guide shows you exactly how to set things up so you can remotely manage your Android phone with ease.
Time to speed things up
Whether it’s from outdated drivers, junk programs, or system infections, you have multiple variables at play that can slow your computer down. It can be overwhelming if you don’t know what to do or where to start, but the tips from this guide should point you in the right direction. Hopefully, you can now prevent future system slowdowns before it has a chance to get out of control.