How to Fix the Windows 11 Taskbar Not Working
The Windows 11 taskbar gives access to frequently used apps, virtual desktops, the Start menu, and quick settings. If it stops working, you’ll likely have issues navigating your computer.
To quickly fix the stuck or unresponsive taskbar, open Task Manager and end the Windows Explorer service. However, the taskbar can also stop working due to a bad Window update, corrupt system files, and issues with system services. Depending on the issue, you’ll need to try multiple solutions to fix the Windows 11 taskbar when it stops working or loading.
1. Restart Windows File Explorer
Windows Explorer is responsible for how you interact with the Windows 11 user interface. Restarting the service will reboot the GUI process and fix any temporary glitches causing the taskbar to stop working.
To restart a Windows Explorer service:
- Press Win + X to open the WinX menu.
- Click on Task Manager to open the app.
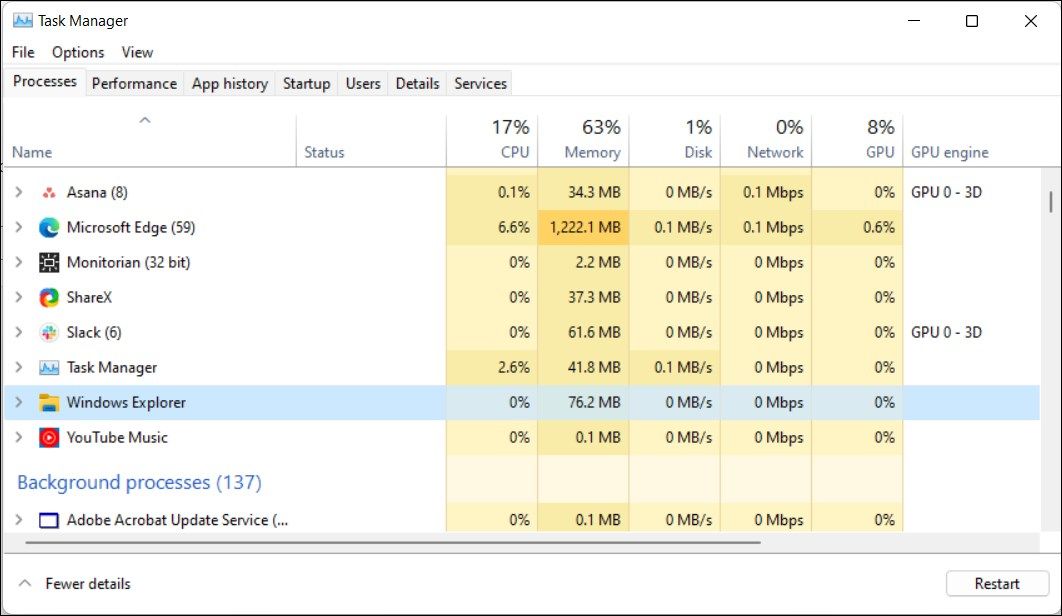
- In Task Manager, open the Process tab and select Windows Explorer.
- Click the Restart task button in the top right corner. Alternatively, right-click on Windows Explorer and select Restart.
- Your screen may flicker for a moment as the Windows Explorer restarts. Your taskbar should start working now.
2. Reinstall and Re-Register All Windows Apps for All Accounts
The Windows 11 taskbar can stop working due to issues with the built-in apps and the user account. To fix the problem, you can reinstall and re-register all the built-in apps using a PowerShell cmdlet. Doing so will restore the taskbar to its working state.
To reinstall and register all Windows apps:
- Press the Win key and type powershell.
- Right-click on Windows PowerShell and select Run as administrator.
- In the PowerShell window, type the following command and press Enter:
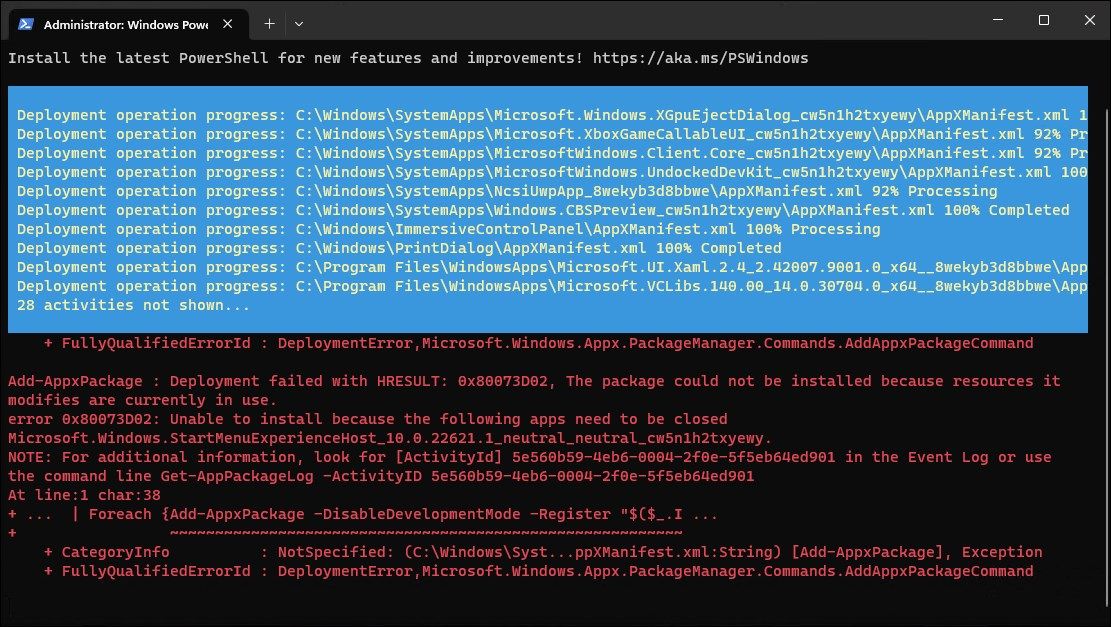
Get-AppXPackage -AllUsers | Foreach Add-AppxPackage -DisableDevelopmentMode -Register "$($_.InstallLocation)AppXManifest.xml" - Windows will now try to reinstall and re-register all the built-in Windows apps. You’ll see an error message in red indicating the app already exists and cannot be reinstalled. Ignore the message and wait for the process to complete till you see the following line:
PS C:UsersAdministrator> - Close PowerShell and restart your computer. If you don’t want to perform a system reboot, restart Windows Explorer in Task Manager.
3. Uninstall the Recently Installed Windows Update
If the taskbar starts to act up after installing a Windows update, uninstall the update to see if it helps fix the issue. Feature Windows updates can sometimes break more things they intend to fix.
Fortunately, you can uninstall updates in Windows 11 using the update history feature. Update history shows all the recent updates installed for Windows 11. You may need to dig around a bit to find an update that coincides with when the taskbar stopped working. Next, uninstall the update and restart your PC to see if the taskbar is working again.
4. Close Conflicting System Services
Issues with some system services, such as searchhost.exe and runtimebroker.exe, can cause the taskbar to stop working. You can restart these services in Task Manager to resolve the issue.
To restart system services in Task Manager:
- Open Task Manager.
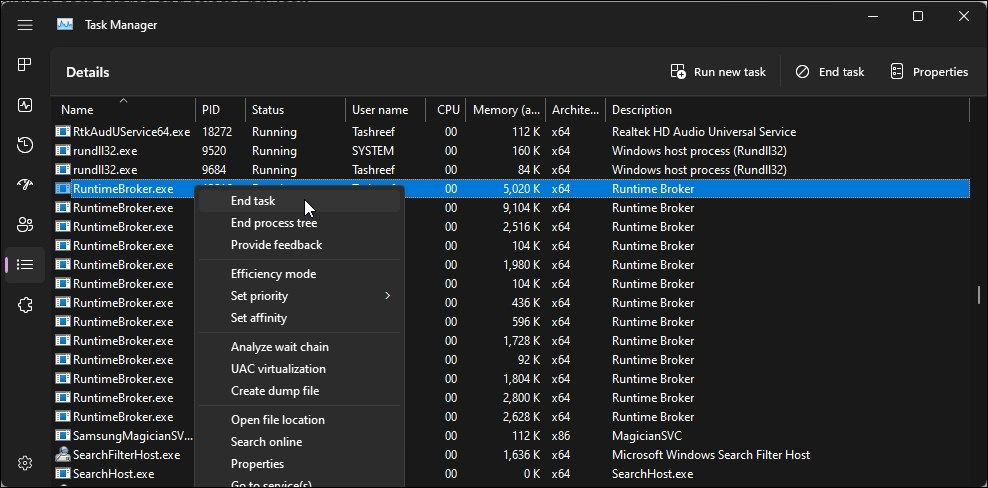
- In Task Manager, open the Details tab in the left pane.
- Next, locate the following services. Right-click on each service and select End Task.
ShellExperienceHost.exeSearchIndexer.exe
SearchHost.exe
RuntimeBroker.exe
- After you restart all the services, close Task Manager and restart your computer. After the computer restarts, check if the taskbar is working.
Another nifty trick to fix the taskbar not working issue is to make the Start menu use XAML and resolve issues that may cause the menu to stop working.
It is a Windows 10 workaround, but it works on Windows 11 as well. That said, this method involves modifying Windows Registry. Incorrect modifications to the registry entry can cause system malfunction. Make sure to create a restore point and take a registry backup before you try the below steps.
To make the Start menu use XAML:
- Press Win + R to open Run.
- Type regedit and click OK. Click Yes if prompted by User Account Control.
- In Registry Editor, navigate to the following location. You can copy and paste the registry path for quick navigation:
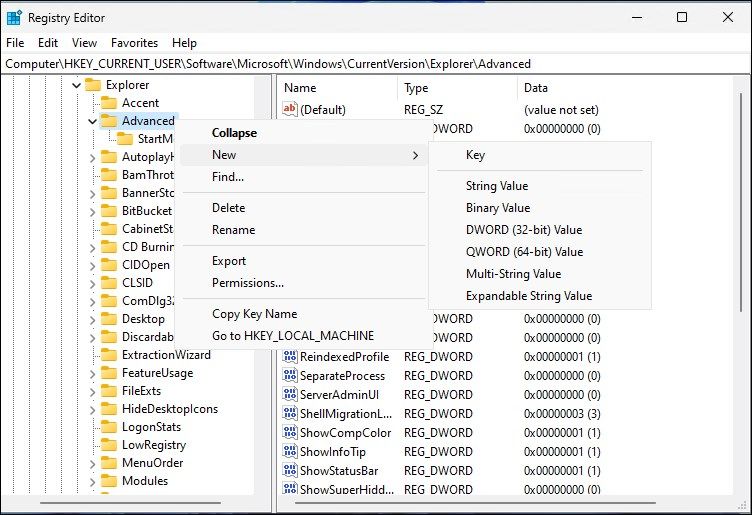
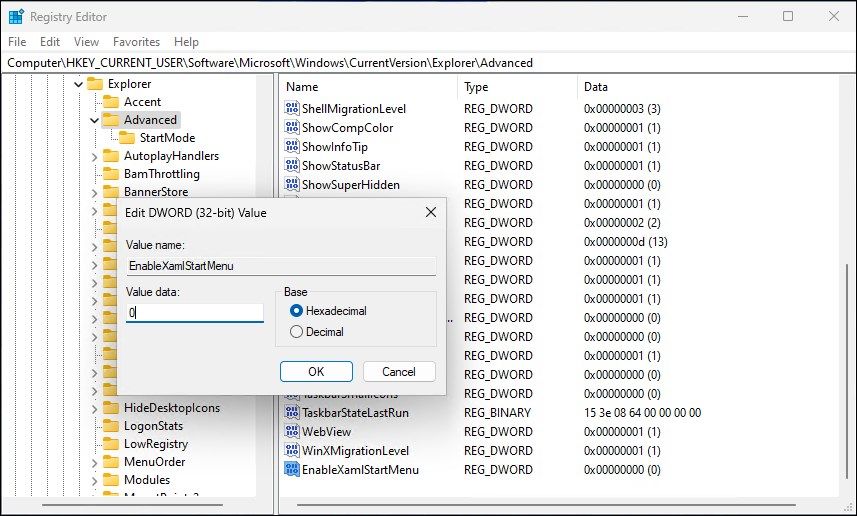
ComputerHKEY_CURRENT_USERSoftwareMicrosoftWindowsCurrentVersionExplorerAdvanced - Next, in the left pane, right-click on the Advanced key and select New > DWORD (32-bit) Value.
- Rename the value as EnableXamlStartMenu.
- Next, double-click on the newly created EnableXamlStartMenu value to modify it.
- Type 0 in the Value data field and click OK to save the changes.
- Close Registry Editor and restart your PC.
6. Run System File Checker and DISM
Windows features a handful of system recovery and repair command-line utilities. System File Checker (SFC), for example, can scan your system for missing or corrupted files and repair them.
In addition, you can also use the Deployment Image Service Management (DISM) utility to fix the corrupt system Windows image and recover your Windows without reinstalling the operating system.
If the taskbar is not loading due to system file corruption, run the DISM utility to repair the Windows image. Next, run System File Checker to fix issues with protected system files. Both processes can take a while to complete.
7. Perform a System Restore
You can use a recent system restore point to restore your PC to an earlier point where the taskbar works. Restore point helps you recover Windows OS when a driver, feature, or application update breaks the system.
To use a restore point, make sure you have set up your PC to create automatic restore points. If yes, follow these steps to restore your OS using system restore. The Restore Points affects system files and applications. Your data will not be affected during the process.
- Press Win + R to open the Run dialog.
- Type rstrui.exe and click OK.
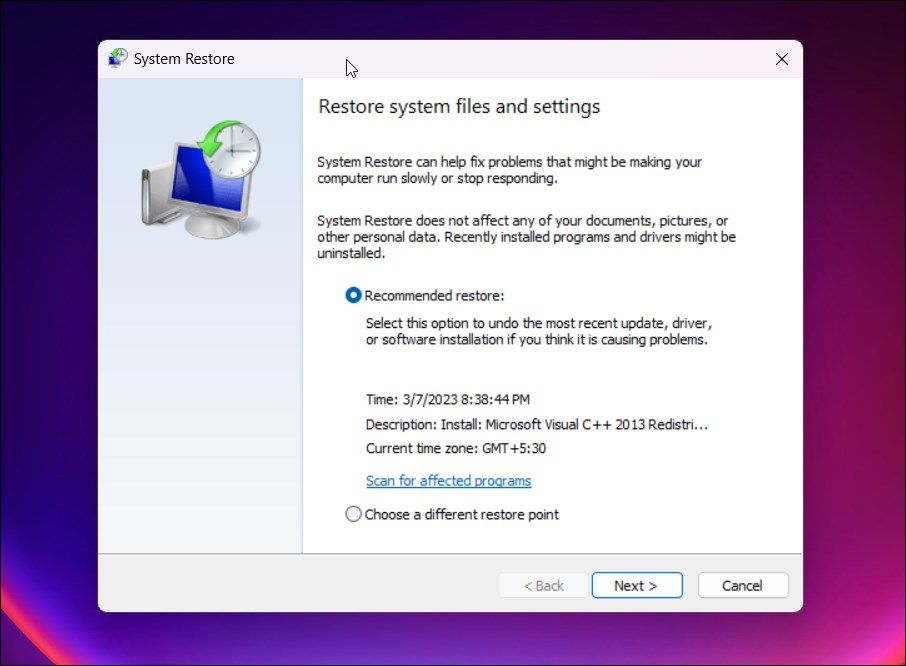
- In the System Restore dialog, you may be prompted to use a recommended restore point. Ensure the restore point was created before the taskbar stopped working, and click Next.
- Alternatively, select Choose a different restore point option and click Next.
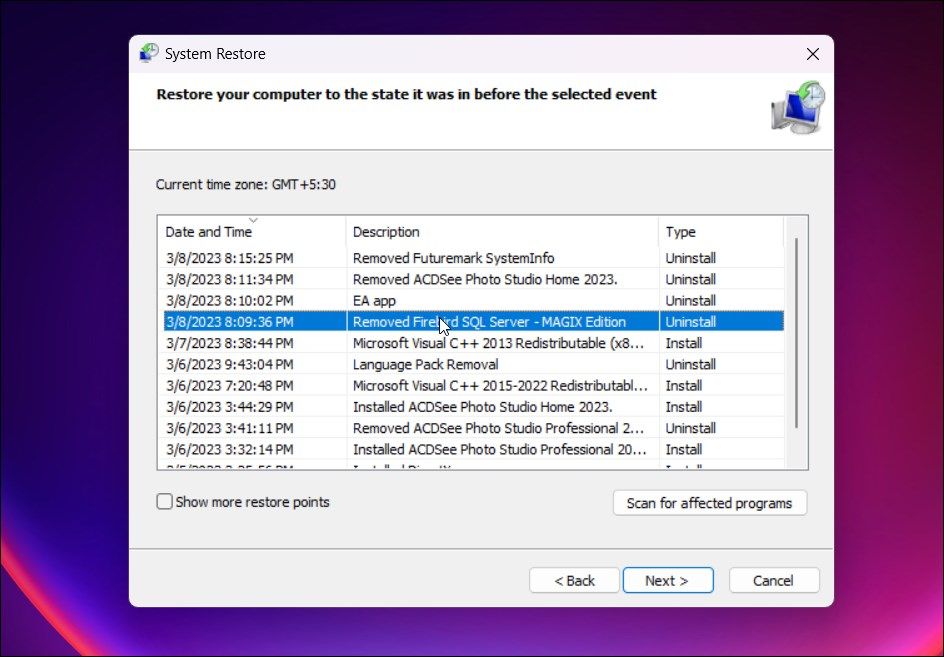
- Here, select the Show more restore points option to view all restore points available.
- Select the most recent one but created before the date of the taskbar issue and click Next. If you want to view which programs will be affected, click on Scan for affected programs.
- Read the description and click on Finish to confirm your restore point.
Your system may restart a few times when system restore is in progress. Leave the system idle and wait for the process to complete. When the system restarts, you’ll see a success message. If not, try again with the same or another restore point if available.
8. Create a New User Account
A corrupt user profile can cause some system functions to stop working. To fix the issue, create a new user account and try to access the taskbar.
You can create a new user account in Windows 11 from the Settings panel, using the User Accounts dialog, Command Prompt, and Local Users and Groups. Next, log in to your new user account and check if the taskbar works.
Easy Fixes to Restore the Windows 11 Taskbar
The Windows 11 taskbar is a vital cog in the operating system and makes it easy to navigate a complicated piece of software for both advanced and standard users. Fortunately, you can restart Windows Explorer in Task Manager to fix most issues with the taskbar.
If the issue persists, check and uninstall bad Windows updates, restart system services, reinstall Windows built-in apps, and perform a restore using restore points.

