

How to Fix the Can’t Boot Windows 11 After Enabling Hyper-V Issue
Hyper-V is Microsoft’s inbuilt solution to run virtual machines. While it may not be as feature-rich as other hypervisors, it still gets the job done. In addition, you get better performance and don’t have to install a third-party app for the same. But several users report that enabling Hyper-V causes problems.
One such common problem is after you enable Hyper-V on Windows 11, it cannot boot to the lock screen. If you face similar issues, don’t worry. We will discuss all the possible reasons for Hyper-V causing problems in your system. Moreover, you’ll learn about the methods to fix it.
Reason for Can’t Boot Windows 11 After Enabling Hyper-V Issue
Windows 11 may not boot after enabling Hyper-V due to many reasons. Some common ones are as follows:
- A third-party application may prevent Windows 11 from booting up if Hyper-V is active.
- The Hyper-V system files are missing or have become corrupt.
- You haven’t updated Windows 11 in a while.
How to Fix Can’t Boot Windows 11 After Enabling Hyper-V Issue
Since you cannot boot to the desktop anymore, you will need to use the Windows 11 Repair tool. You will have to create a bootable installation media of Windows 11 on a flash drive. Moreover, you need to use another system for this process. For more details, check our guide on multiple ways to create a Windows 11 bootable USB drive.
1. Uninstall Conflicting Applications
IBM Trusteer Rapport is an application notorious for posing problems with virtualization enabled. Many prefer Trusteer Rapport to protect their system from financial malware and phishing attacks. But, you will have to uninstall it and let Windows 11 boot normally with Hyper-V enabled.
To remove the conflicting applications, retrace the following steps:
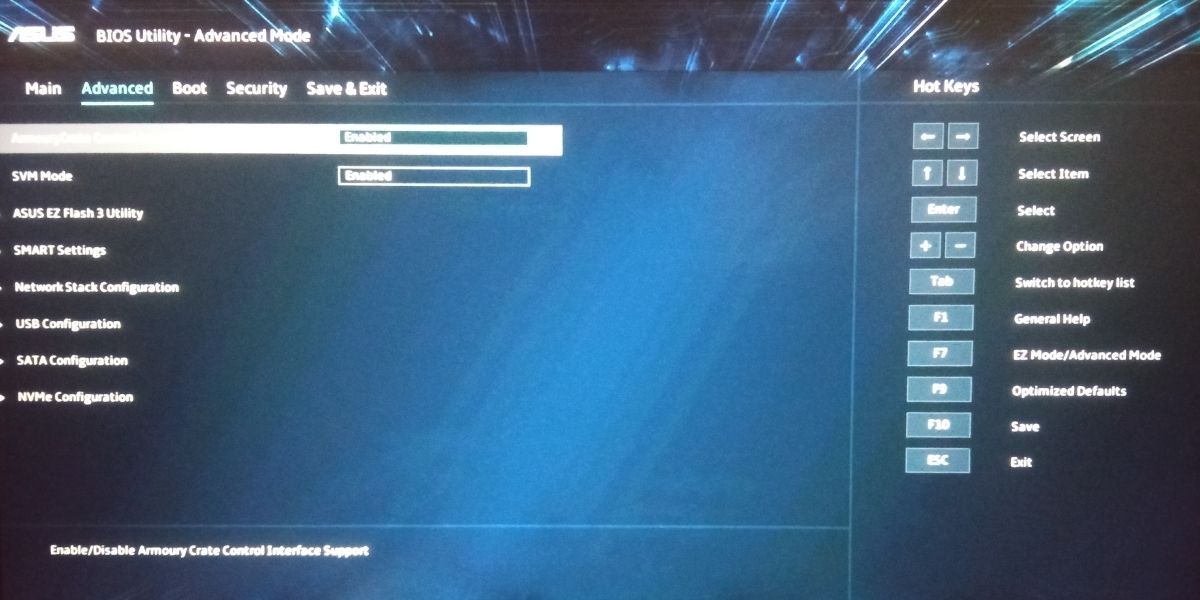
- Insert the Windows 11 bootable media into your computer. Power on your system and press the designated key to enter the BIOS Setup screen. It is usually the F12 key, but it may be different for your system.
- Now, press the tab key to move to Advanced Settings. Find the Virtualization setting and disable it. Press F10 to save the changes and then restart your system.
- After the system successfully boots to the desktop, press the Win key and search for Control Panel.
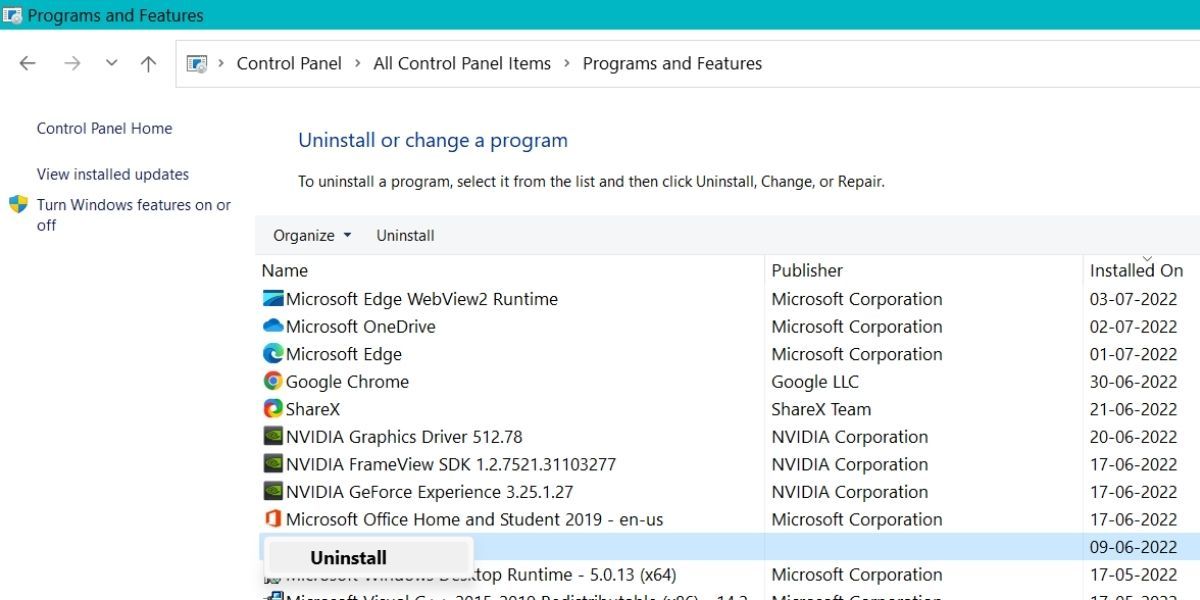
- Click on the first search result and launch the control panel. Find the Uninstall a Program feature located under Programs and Features.
- Then, locate the IBM Trusteer Rapport app in the list of installed programs.
- Right-click on it, then click on the Uninstall/Change option. UAC will pop up and confirm your decision.
- Click on OK and then proceed to the uninstallation. Follow the onscreen prompts to remove the program from your system completely.
- Restart your system and press the F12 or the designated key to enter the BIOS Setup. Re-enable the Virtualization settings and save changes by pressing the F10 key.
- Now, restart your system, and it should boot to the Windows 11 lock screen without an issue.
2. Tweak Startup Settings
Another option is to use the installation media to change the Startup Settings. Using the command prompt, you will need to disable an important flag in BCD. This flag is notorious for causing Boot Repair Loop. After that, the system should boot without an issue.
To tweak the startup settings, do as follows:
- Restart your system and press the designated F-key to enter the boot menu. Boot using the installation media and then click on the Repair your computer option.
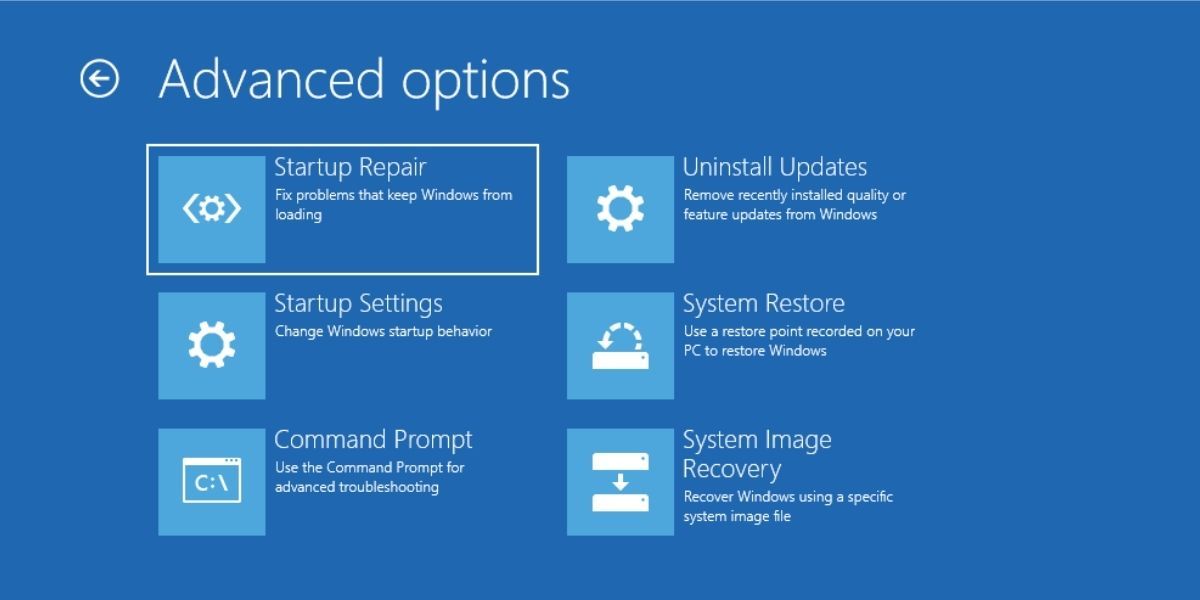
- Then select the Troubleshoot option on the next page. Click on the Startup Settings option under Advanced Settings.
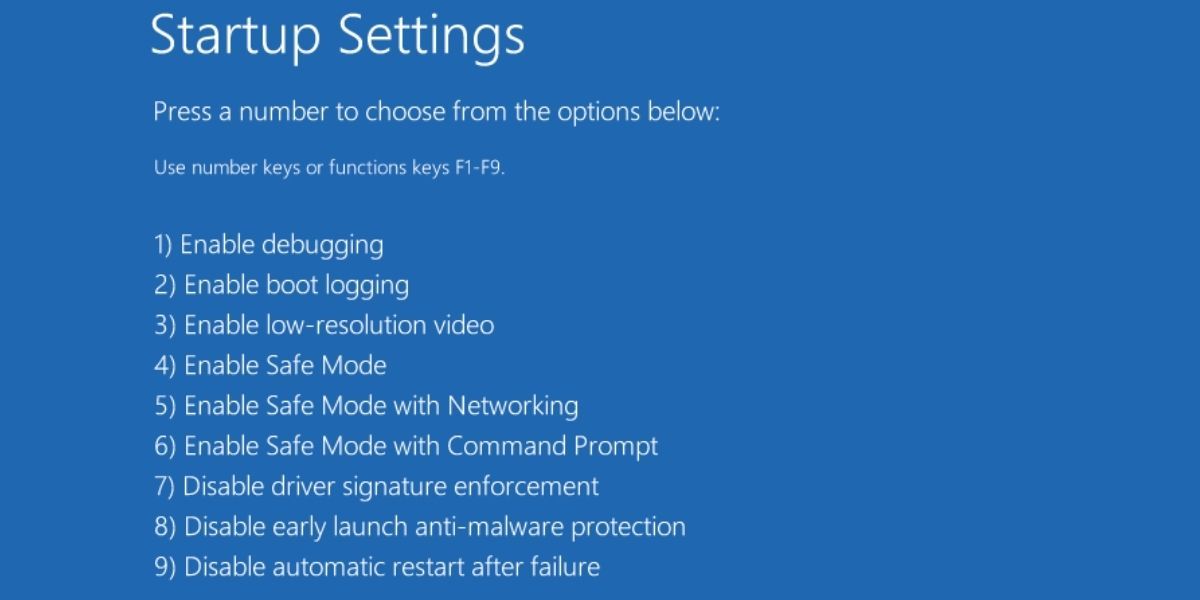
- After your system reboots, press F5 to enter Safe Mode with Networking. Then, press Win + R to launch the Run command box and type cmd.
- Hit the enter key and type the following command in the command prompt window: BCDedit /set hypervisorlaunchtype Off
- Press the enter key. Close the CMD window after the command executes successfully.
- Then, restart the system to check if the boot repair loop issue exists.
3. Revert to an Older System Restore Point
If disabling the hypervisorlaunchtype flag in BCD didn’t fix the issue, try a System Restore. The feature lets you restore Windows to a point when it was working without any issues. Remember that your system must have one or more restore points to perform a System Restore.
If you want to learn more about System Restore, check our guide to Create a Restore Point in Windows 11.
To perform a System Restore, repeat the following steps:
- Power on your System and press the designated F-key to open the boot menu. Select the Windows 11 installation media and press enter key.
- Click on the Next button in the Windows 11 setup window. Then click on the repair your computer option.
- Select the Troubleshoot option and click on the System Restore icon on the Advanced Settings page.
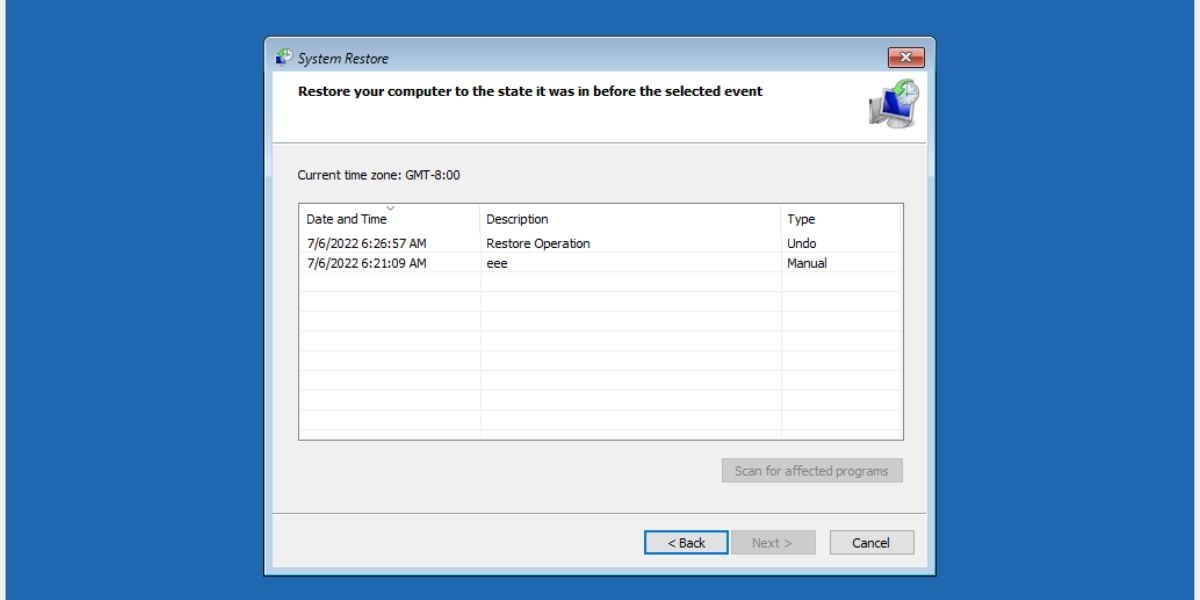
- System Restore Window will launch. You will see a warning message if your system has no existing restore points.
- If your system has an existing restore point, you will see the Next button at the bottom. Click on it and pick the latest restore point from the list.
- Then click on the Scan for affected programs button. It will check and display all the programs you will lose if you do a System Restore. Click on the Close button after you verify the list.
- Click on the Next button. System Restore will confirm your decision about reverting to a restore point with its details. Click on the Finish button to begin System Restore.
- Next, you will see a warning message that System Restore is invulnerable to interruption. Click on the Yes button to continue.
- You see that the computer will auto-restart and then roll back to an earlier restore point.
- After a restart, your system will boot to Windows 11.

4. Perform a Windows 11 Reinstall
The last resort is to reinstall Windows 11. We understand that you may have crucial documents stored in the C drive. So, you can opt for the upgrade installation type. It preserves your files and documents and replaces Windows files.
To reinstall Windows 11, do as follows:
- Power on your System and press the designated F-key to open the boot menu. Select the Windows 11 installation media and press enter key.
- Click on the Next button in the Windows 11 setup window. Then click on the Install Now button.
- Enter the product key if you have one. Otherwise, click on I don’t have product key option. Then, pick your preferred version of the OS (Home, Pro, Enterprise, etc.) and click on the Next button.
- Accept EULA and click on Next. Choose the Upgrade option to keep all your files. Then format the C drive and select that for installing Windows 11.
- Wait for the installation to complete. Your system will restart multiple times. After that, follow the onscreen prompts and configure Windows settings. Then, you can access your system and old files.


Successfully Boot Windows 11
The most probable cause of a boot loop is a third-party application. Uninstalling it resolves the boot issue in many cases. If that doesn’t do any good, then tweaking startup settings usually does the trick. Otherwise, a System Restore or a Windows 11 reinstall are your two remaining viable options.