

How to Fix Quick Settings Not Working on Windows 11
Windows 11 has a Quick Settings tool that lets you change frequently-adjusted settings without opening the Settings menu. The app provides quick access to audio monitoring, brightness control, Wi-Fi, and Bluetooth settings.
However, Quick Settings can sometimes have problems that prevent you from opening them on Windows 11. This guide will cover all the possible solutions to help fix the problem.
What Causes the Quick Settings to Stop Working on Windows 11?
Different factors may cause Quick Settings to stop working, but you may generally encounter them after installing Windows 11. Other than that, a few other factors can cause this error.
In general, the error appears due to corrupt system files. However, there’s also the chance that a third-party program is interfering with it and causing it not to work. If you encounter this problem, here are some steps to try.
1. Run the System File Checker
If you suspect that your system has some corrupted system files, you should perform a System File Checker (SFC) scan. The SFC tool is a Windows built-in program that can scan and repair faulty system files in Windows.
- Click on the Start Menu, search for Command Prompt, and select Run as administrator from the right pane.
- When the Command Prompt window opens, type the following:
sfc /scannow
- Now press the Enter key to execute the command.
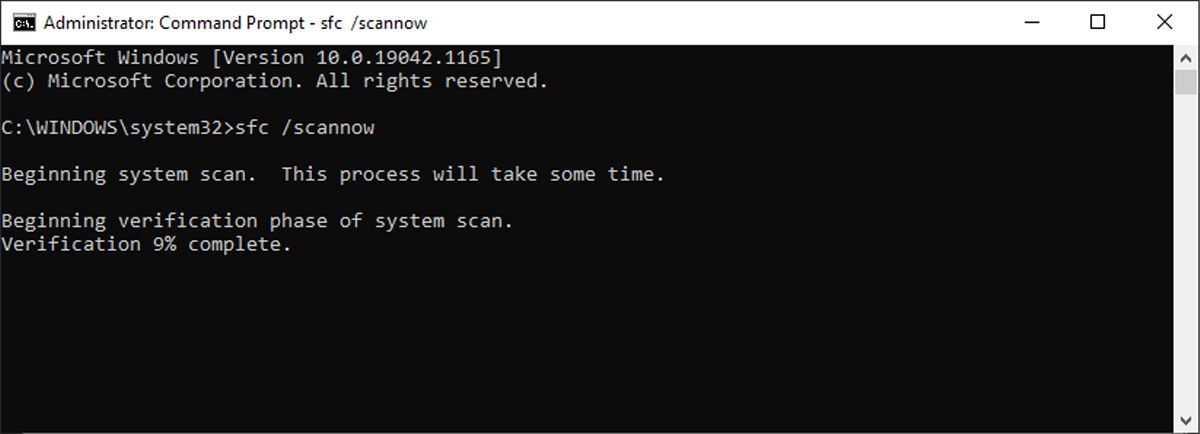
The program will check for and repair any corrupted system files when running the SFC scan. The scan will take a few minutes to finish, so please wait patiently. After it completes, restart your computer and press Win + A to see if it resolves the issue.
If SFC fails to detect the problem, you can use DISM (or Deployment Image Servicing and Management) to restore your disk’s health. To run the DISM scan, follow the below steps.
- Open Command Prompt with admin access, as you did earlier.
- Once it opens, run the following commands one at a time.
DISM /Online /Cleanup-Image /CheckHealthDISM /Online /Cleanup-Image /ScanHealthDISM /Online /Cleanup-Image /RestoreHealth
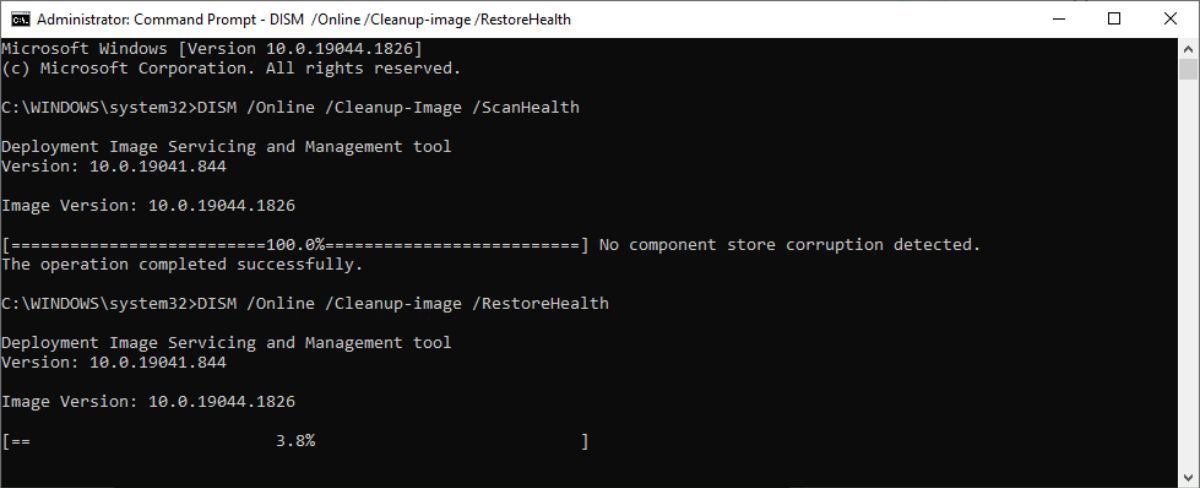
After you run the above commands successfully, restart your computer and check if you can now use Quick Settings.
3. Re-register the Action Center
If the Action Center isn’t working correctly, it can, in turn, cause issues within Quick Settings. To solve this problem, re-register the Action Center and check if it solves the issue:
- Press the Win + R keys to open the Run dialog box.
- Type cmd in the text box and press the Ctrl + Shift + Enter keys.
- When UAC appears on the screen, click Yes to open the Command Prompt window.
- In the Command Prompt window, copy and paste the below command line.
Get-AppxPackage | {5376dfc28cf0a7990a1dde1ec4d231557d3d9e6448247a9e5e61bb9e48b1de73} Add-AppxPackage -DisableDevelopmentMode -Register "$($_.InstallLocation)AppxManifest.xml" -verbose - Now press Enter to execute the command.
After you have completed the steps above, close the Command Prompt window and restart your computer. Upon rebooting your PC, check to see if the quick setting is working as it should.
4. Modify the System Registry
If you’re willing to put in some effort, changing some registry files can solve the Quick Settings problem on your computer. The Registry Editor contains crucial files essential to Windows and its applications.
If you modify the registry, keep in mind that editing files without care or consideration is dangerous and can corrupt your system. You should therefore create a backup of your registry before making any changes.
- Open the Start menu, search for regedit, and hit Enter to open the Registry Editor window.
- Click on the Yes button when UAC appears on the screen.
- Go to the following path in the Registry Editor.
HKEY_CURRENT_USERSoftwareMicrosoftWindowsCurrentVersionPoliciesExplorer
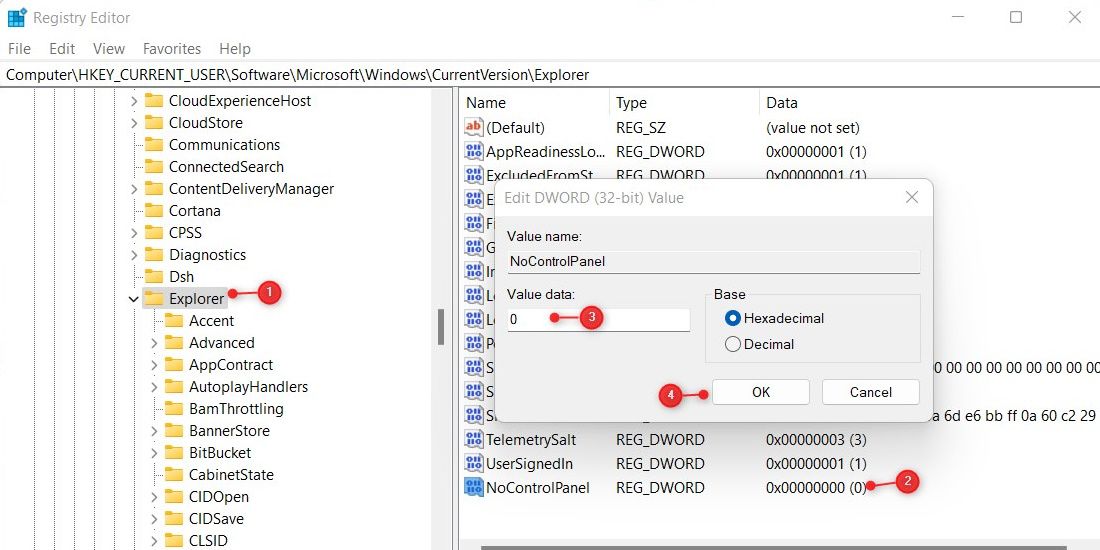
- Select the Explorer key in the left pane.
- Now right-click on some empty space and select New > DWORD (32-bit) Value.
- Name the folder NoControlPanel and press Enter to save it.
- Right-click on the newly created folder and select Modify from the context menu.
- In the popup window, set the Value data to 0 and the Base as Hexadecimal.
- Then click the OK button and close the Registry window.
After you complete the above steps, restart your computer to apply the changes. Upon starting up your computer, try to open Quick Settings again.
5. Perform a Clean Boot
If the problem persists, you may need to perform a clean boot of Windows 11. Only the most basic drivers and programs are loaded when you do a clean boot. If this solves the issue, you know that something you installed is causing the problem.
Follow the steps below to perform a clean boot and manually diagnose the issue.
- Right-click on Start and select Run from the menu list.
- In the text box, type msconfig, and press Enter
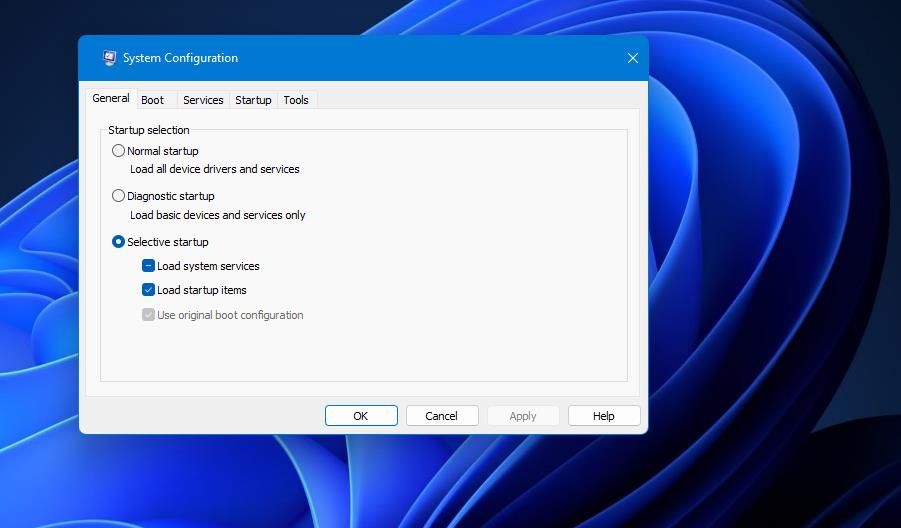
- Go to the General tab in the System Configuration window
- Check the box next to Selective startup.
- Uncheck the box for Load startup items.
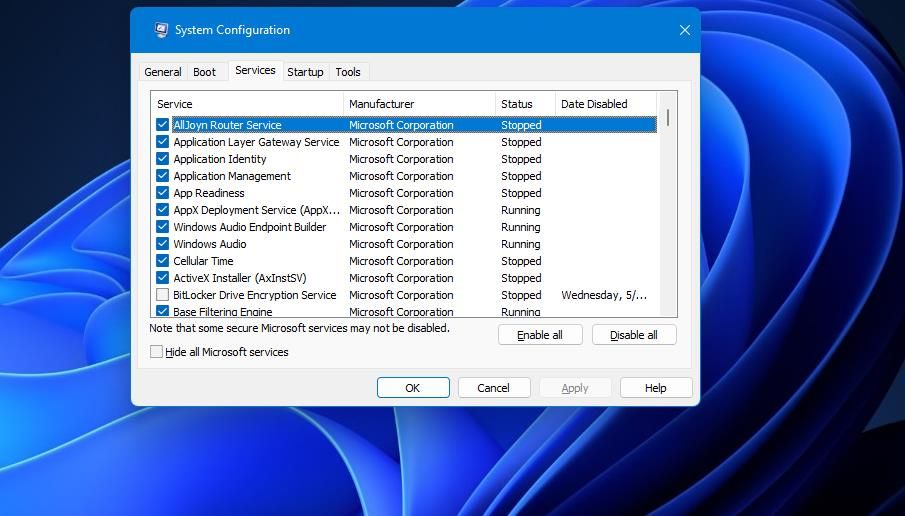
- Then switch to the Services tab.
- Check the Hide all Microsoft services box, then click Disable all.
- To save the changes, click the Apply button.
- Afterward, go to the Startup tab and click on the Open Task Manager link. This button will take you to the Startup tab in the Task Manager.
- On the Startup tab, right-click each service and disable it.
- Once you have done that, close the dialog box and go back to the System Configuration window.
- When you are done, click OK to save your changes.
Once you have completed the above steps, restart your computer and check to see if the quick settings are working. If it now works perfectly, it’s a third-party app causing problems with Quick Settings.
In this case, you must enable each service and app one by one and determine which one is causing the problem. Then, when you find it, remove the program from your device, and it should finally release its grip on your Quick Settings panel.
6. Perform a System Restore
When you’ve tried all the methods above and the problem persists, try performing a System Restore on your Windows PC. This tool will restore your computer to a point before the problem occurs and is well worth a shot if nothing else seems to work.
Fixing the Windows 11 Quick Settings Issue
The quick Settings panel gives you quick access to frequently used settings and functions, but sometimes the corrupt files on your computer hamper its performance or even cause it to freeze. When this occurs, you can use the information above to resolve the issue. You can report this issue using the Feedback Hub application if none of these options work.