

How to Fix Missing Tabs in Windows 11 File Explorer
Windows 11’s File Explorer tabs are a godsend, but sometimes they need a little bit of help showing up.
Microsoft gave Windows users plenty of reasons to be excited about the Windows 11 version 22H2 update, which was released in October 2022.
One of the most expected features included in this update is represented by File Explorer tabs. Explorer tabs are designed to make files and windows management easier, as you’ll only have multiple tabs within the same File Explorer window, instead of numerous windows spread across your screen.
If File Explorer keeps opening a new window for every folder you access, you can use the tips below to troubleshoot the problem.
1. Update to Windows 11 22H2
To get File Explorer tabs on your computer, you must run the Windows 11 22H2 version. So, if you’ve somehow missed the latest update, here’s how you can update to Windows 11 22H2:
- Press Win + I to bring up the Settings menu.
- From the left pane, select Windows Update.
- Click the Download & install button if Windows informs you that version 22H2 is available.
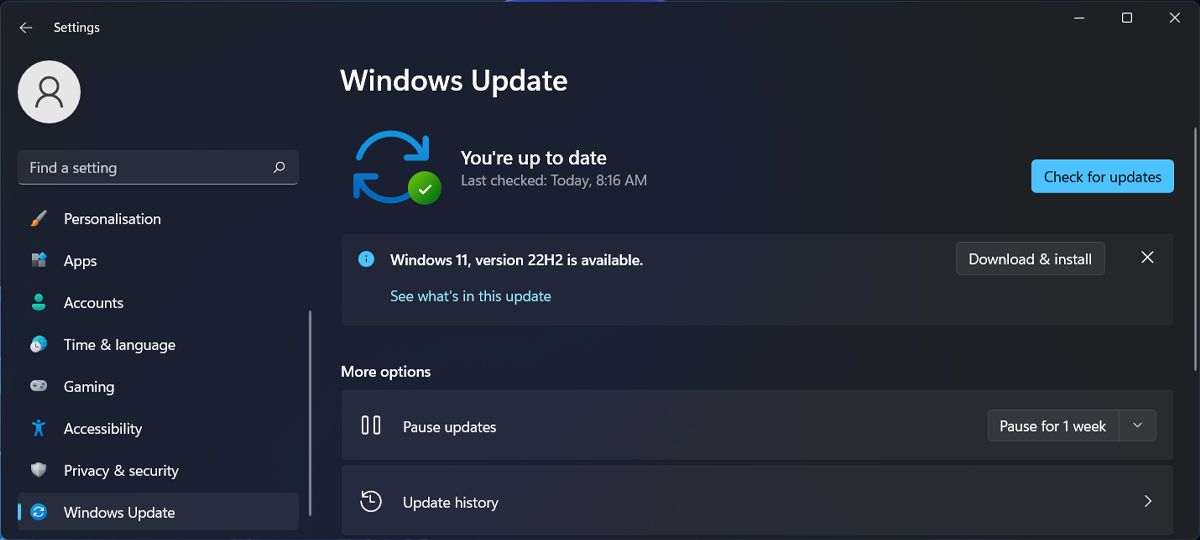
You’re already running the latest version if you see the No updates available message. In this case, move on to the following solutions.
2. Restart File Explorer
Tabs might be missing from Windows File Explorer due to a temporary glitch. If there are other File Explorer features that are acting up, you should restart it.
Close File Explorer and press Ctrl + Shift + Delete to bring up Task Manager. There, right-click Windows Explorer and select End Task to stop any related processes from running in the background.
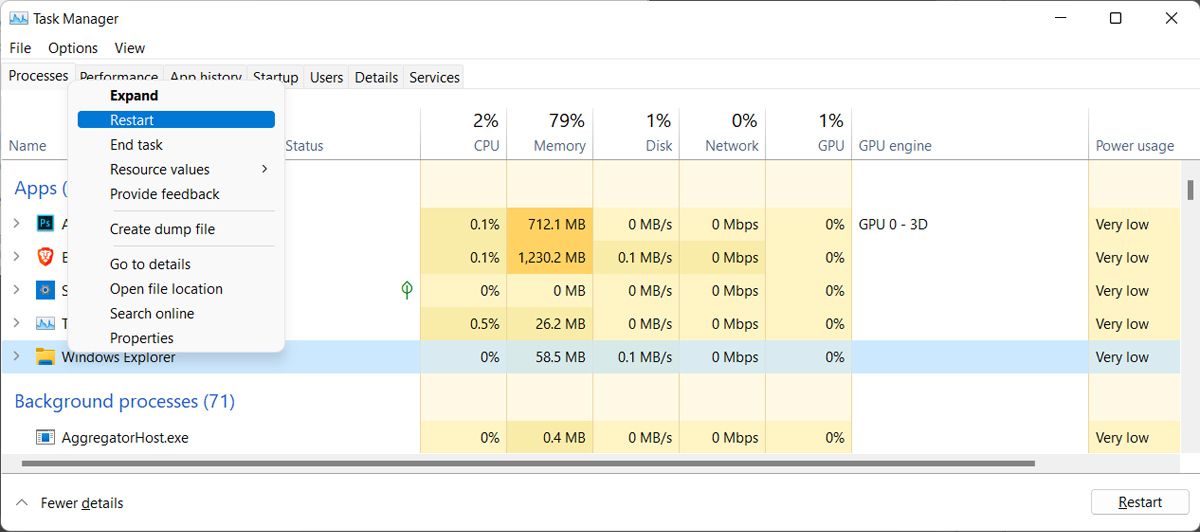
Close Task Manager, launch File Explorer, and check if the problem is now solved.
3. Remove File Explorer Cache
Every app on your computer stores cache files to improve overall performance. But if there are too many cache files or these files get corrupted, you’ll experience all sorts of issues, including tabs missing from File Explorer.
Follow these steps to clear File Explorer cache files:
- Launch File Explorer.
- From the top-right corner, click the three-dots icon and select Options.
- Open the General tab.
- Click the Clear button.
- Click Apply > OK.
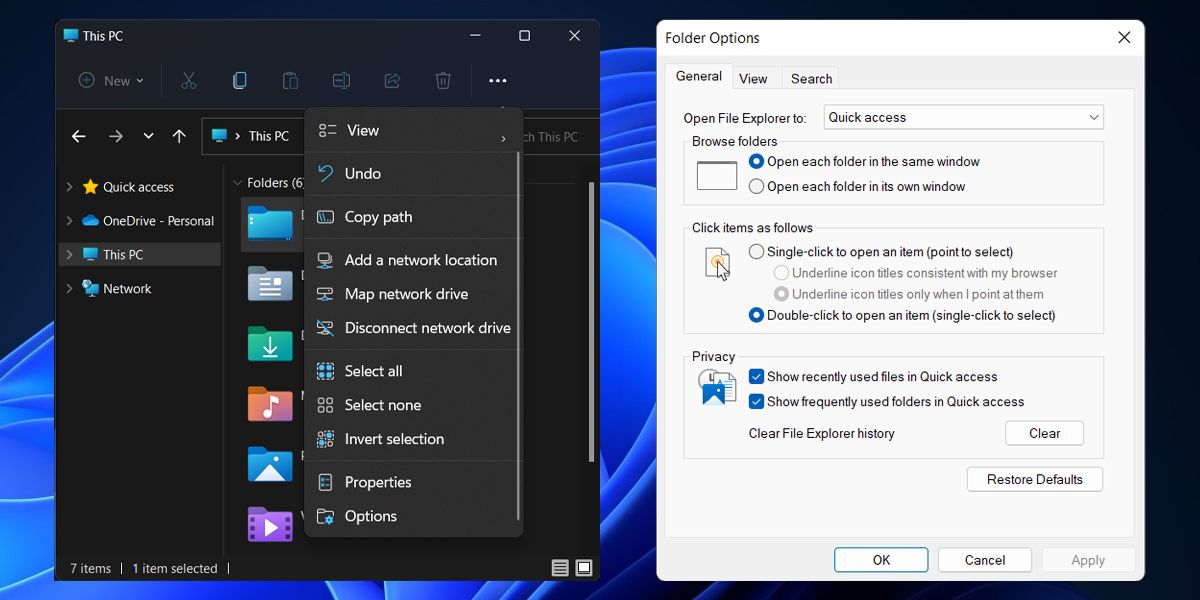
If you often have to go through the above process manually, you can use Storage Sense to clean your caches in Windows 11.
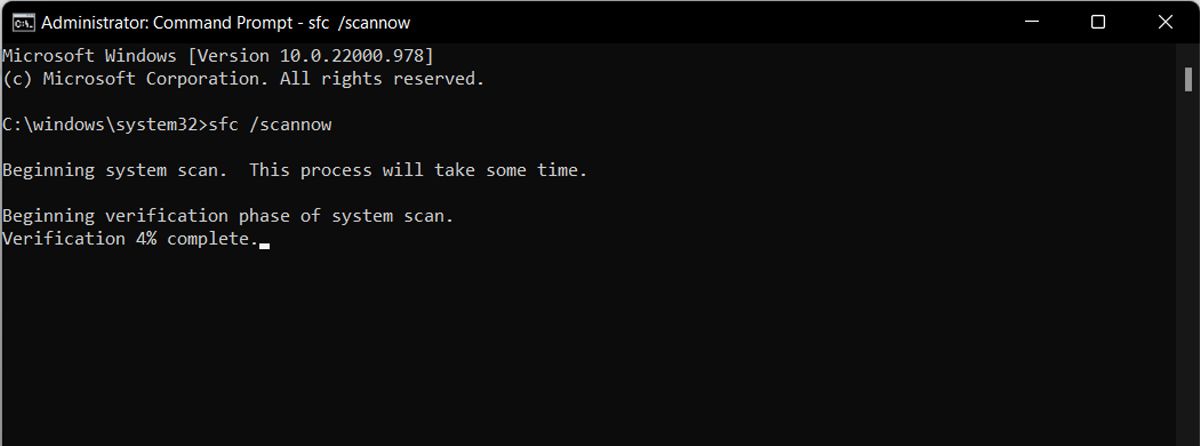
4. Run the System File Checker
The System File Checker (or SFC) is one of the built-in Windows tools you can use to fix corrupted system files. If this is the reason for File Explorer’s missing tabs, running the tool should fix it.
In the Start menu search bar, search for command prompt and select Run as administrator. Type sfc/ scannow and press Enter to run the command.
5. Reinstall Windows Updates
There’s a chance File Explorer’s tabs are still missing even after updating to Windows 11 22H2 because of an update malfunction. In this case, reinstalling the update should fix the problem.
- Right-click the Start button and go to Settings.
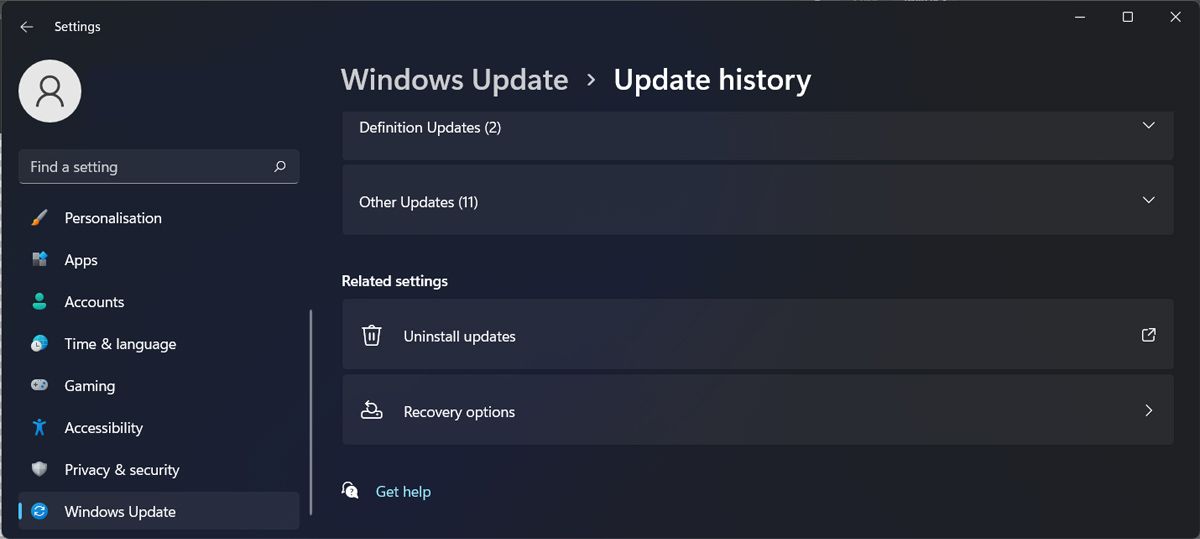
- Select Windows update > Update history.
- Scroll down to the bottom of the page and click Uninstall updates.
- From the list of recently installed updates, right-click the 22H2 update and click Uninstall.
- Reinstall the update as we’ve shown above.
This solution works for recent updates. If it’s been a while since you’ve updated to Windows 11 22H2, you’ll have to load a restore point to revert your computer to the previous Windows version.
Get Your File Explorer Tabs Back on Windows 11
The File Explorer tabs were long overdue, so there’s no reason to wait for even more before you can use them. Hopefully, one of the methods above helped you fix the problem, and you can easily browse through multiple folders.
Now, you should know that having tabs within File Explorer isn’t the only thing that can change the way Windows looks and feels.