

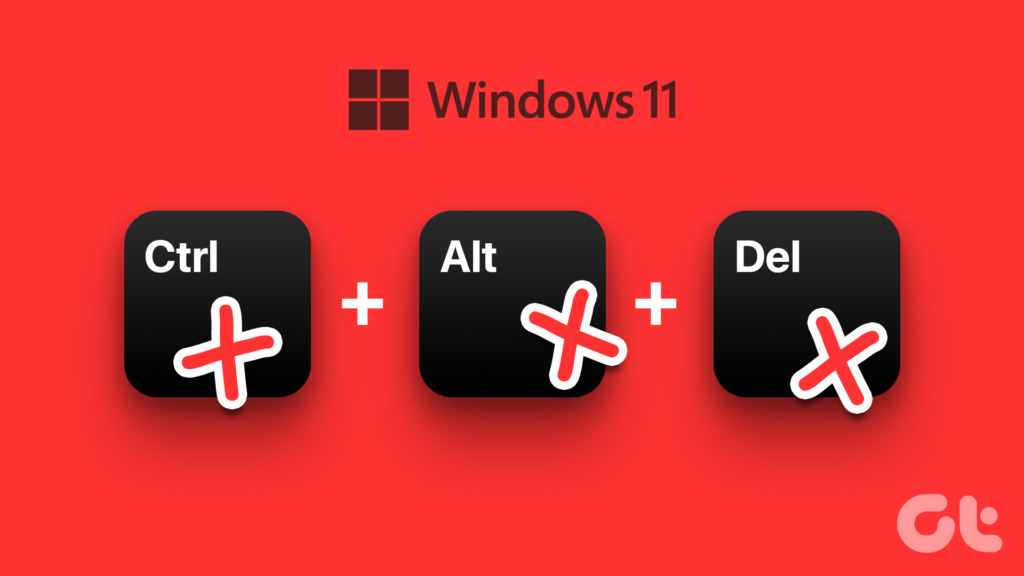
6 Best Ways to Fix Ctrl-Alt-Delete Not Working on Windows 11
Ctrl-Alt-Delete is arguably one of the most used keyboard shortcuts on Windows. You can use it to quickly log out of your PC, access the power menu, launch Task Manager to end unstable programs or processes and much more. But, it can scare you if it suddenly stops working for some mysterious reasons.
We’ve compiled the best solutions when the Ctrl-Alt-Delete shortcut refuses to work on your Windows 11 computer.
Before you proceed with troubleshooting, first thing you’ll need to inspect is whether your keyboard works fine. Connect your keyboard to another PC to check if those keys work. Refer to our guide on how to fix a keyboard when it’s not working on Windows.
Alternatively, almost all Windows-compatible keyboards come with two sets of Ctrl and Alt keys—one on the right and one on the left. You might have a second chance at using the Ctrl-Alt-Delete shortcut.

2. Restart the Windows Explorer
Processes relating to Windows Explorer are crucial for the proper functioning of the Taskbar, Start menu, File Explorer, etc. However, if they fail to function normally, you may experience glitches such as disappearing taskbar icons, the preview pane not working, etc.
You can quickly fix such issues by restarting Windows Explorer from Task Manager. Here’s how:
Step 1: Press the Windows + X keys to open the Power User menu and select Task Manager.
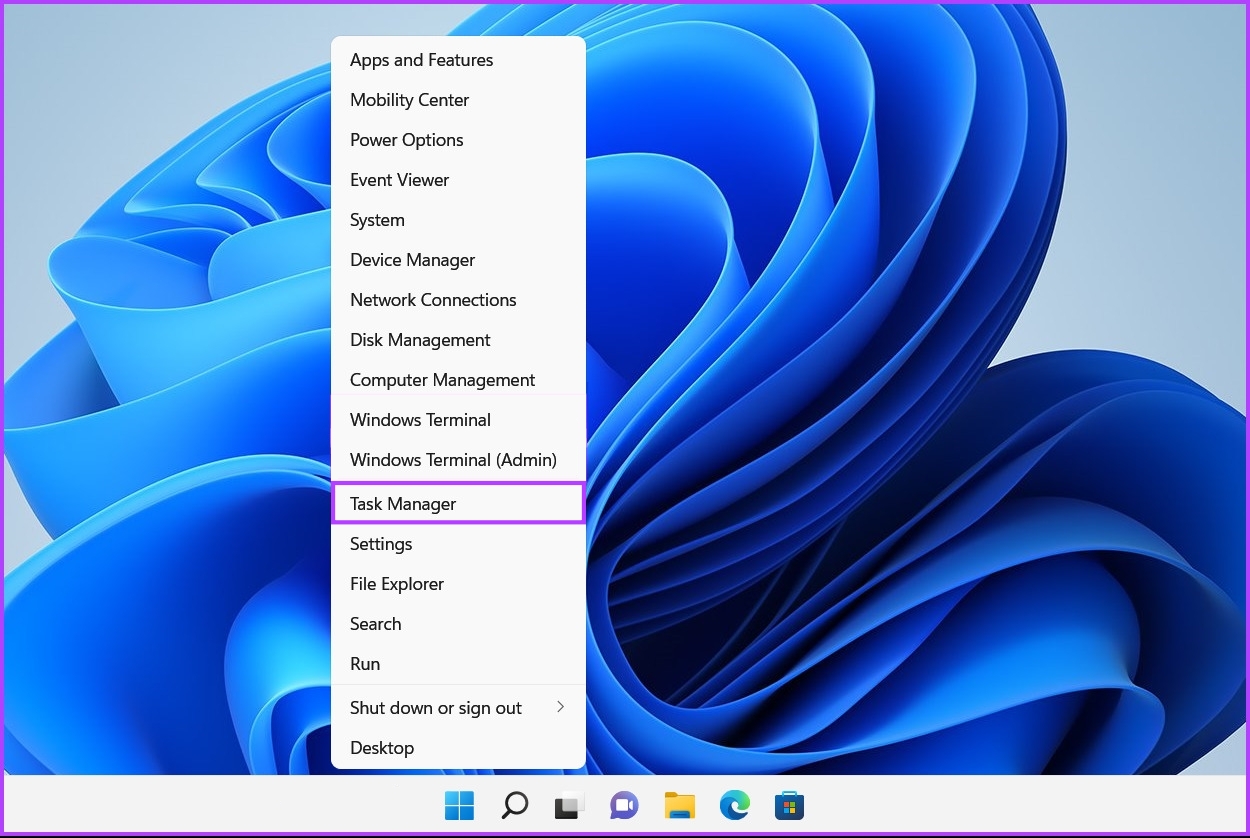
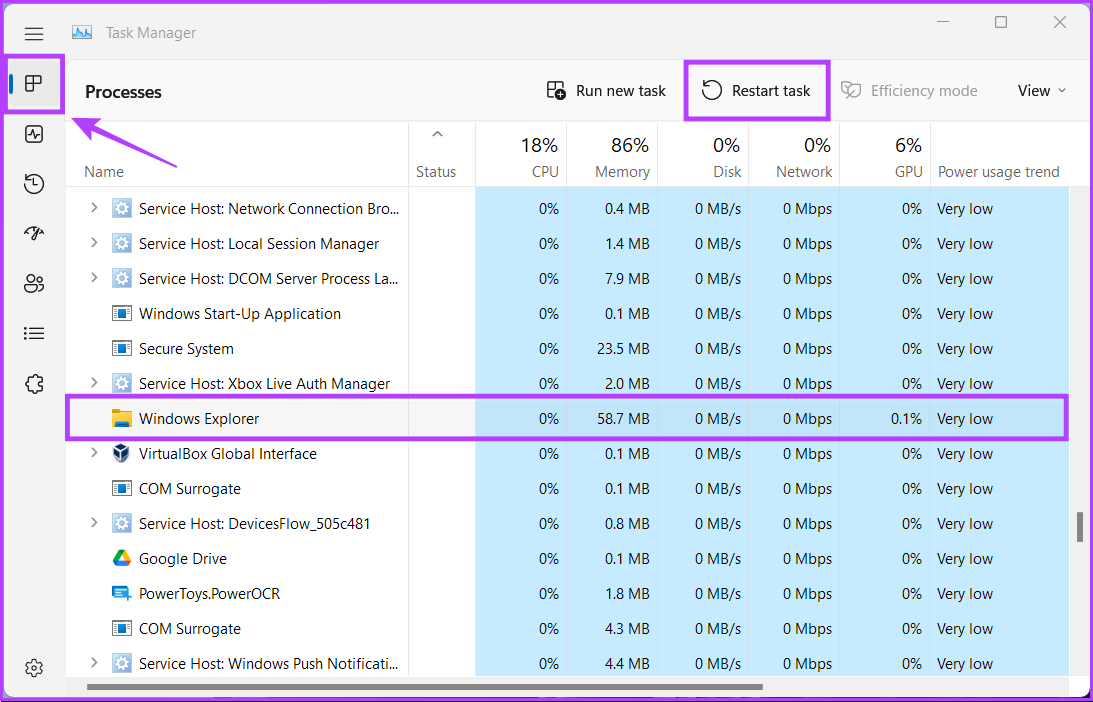
Step 2: In the Task Manager window that appears, stay on the processes tab and select the Windows Explorer process. Then, click on the Restart task button.
If you see more than one process related to File Explorer, select the one with higher memory usage.
After you restart Windows Explorer, the Ctrl-Alt-Delete shortcut will function usually. If that doesn’t help, move on to the next solution.
3. Check for Windows Update
While this might seem trivial, you can fix almost all issues on your Windows computer with a simple software update. Updating the version of Windows ensures that you have the latest bug fixes, drivers, and the latest security updates that help improve your computer’s performance and stability.
Here’s how you can check for Windows updates on your Windows 11 PC:
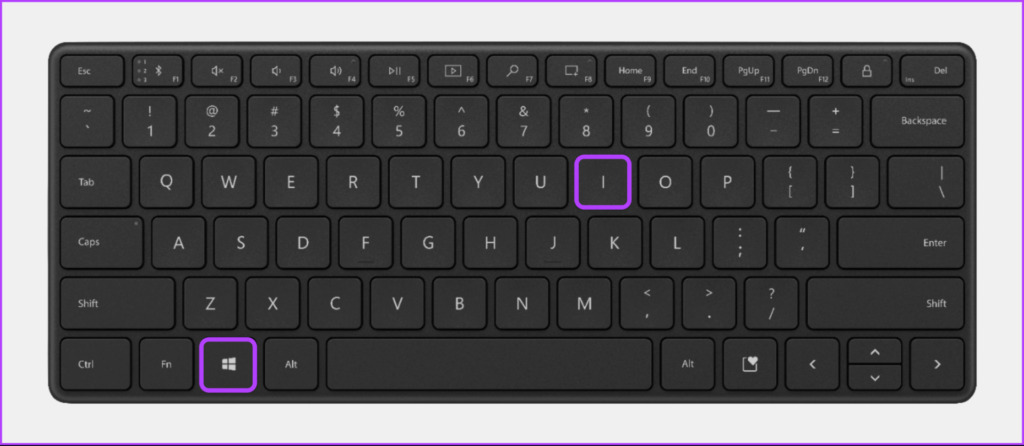
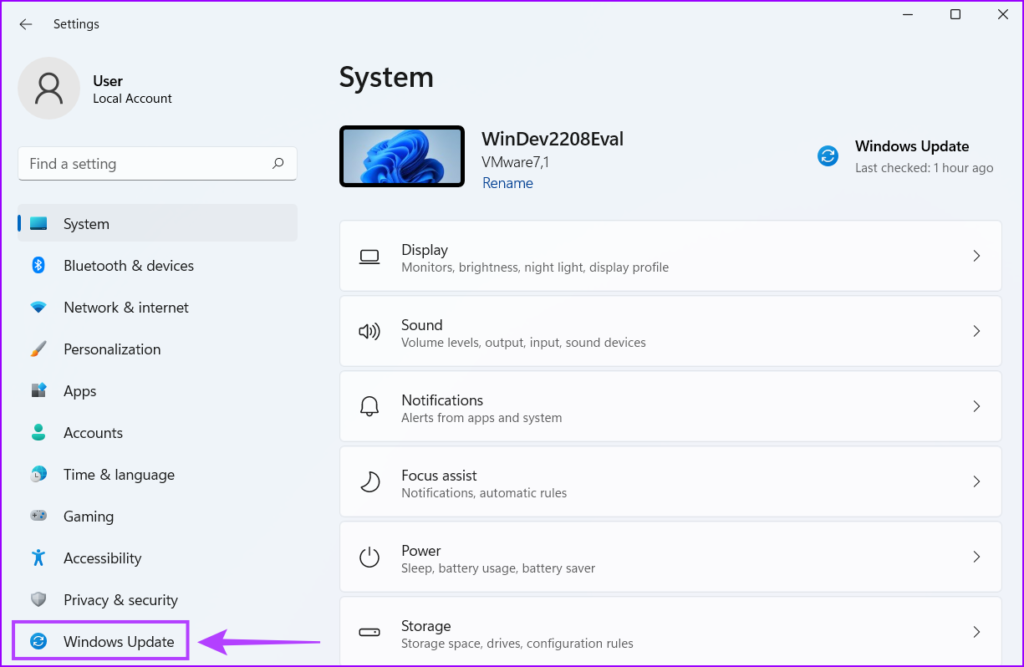
Step 1: Press the Windows + I keys together to open the Settings app.
Step 2: Select Windows Update from the left sidebar in the Settings window.
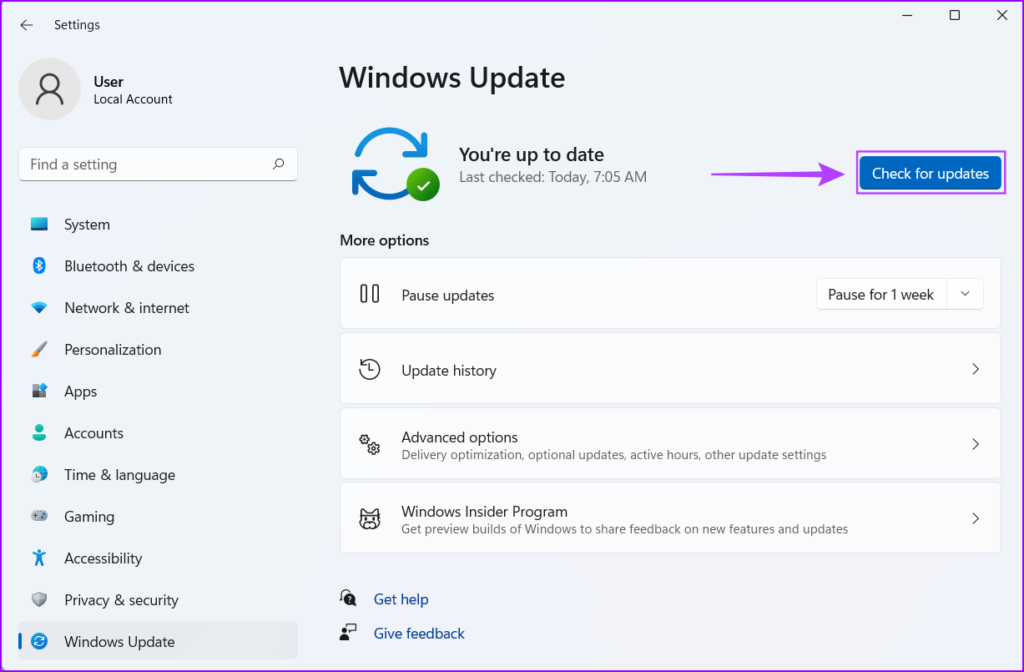
Step 3: Now click the Check for updates button.
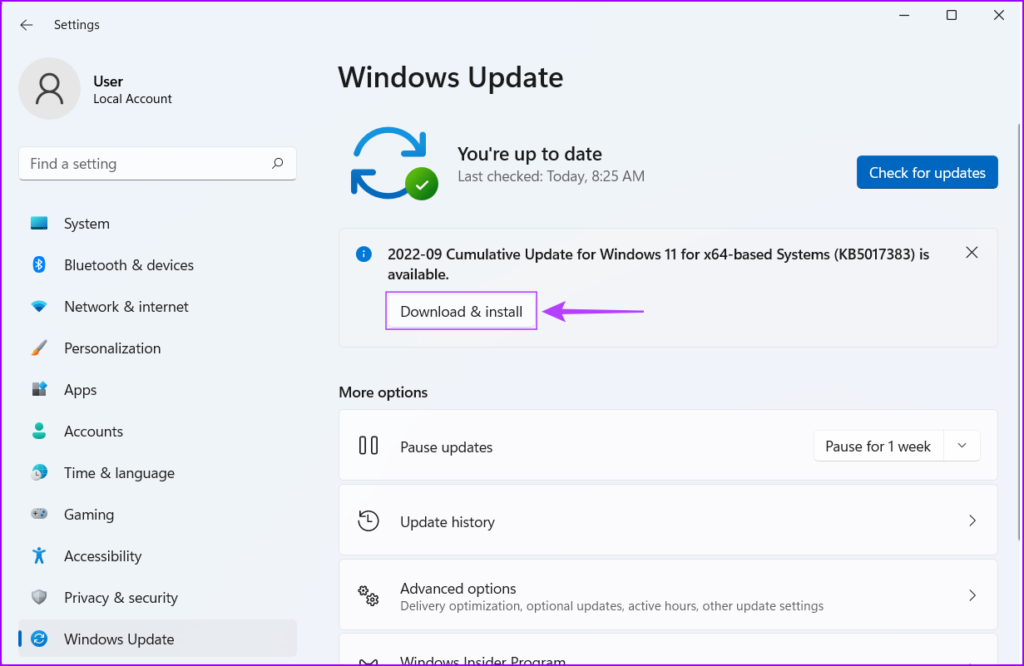
If a new windows update is available, install it and check if it fixes the corrupted files and the features dependent on those files.
Can’t download Windows Updates? Check our guide on fixing Windows 11 updates not downloading or installing.
4. Update or Reinstall the Keyboard Drivers
Windows 11 may not function smoothly if it has unstable or outdated drivers. That might be the rason your keyboard malfunctions. So it’s a good idea to update or reinstall the keyboard drivers on your computer.
Here’s how you can easily update or reinstall the keyboard drivers on your Windows 11 PC.
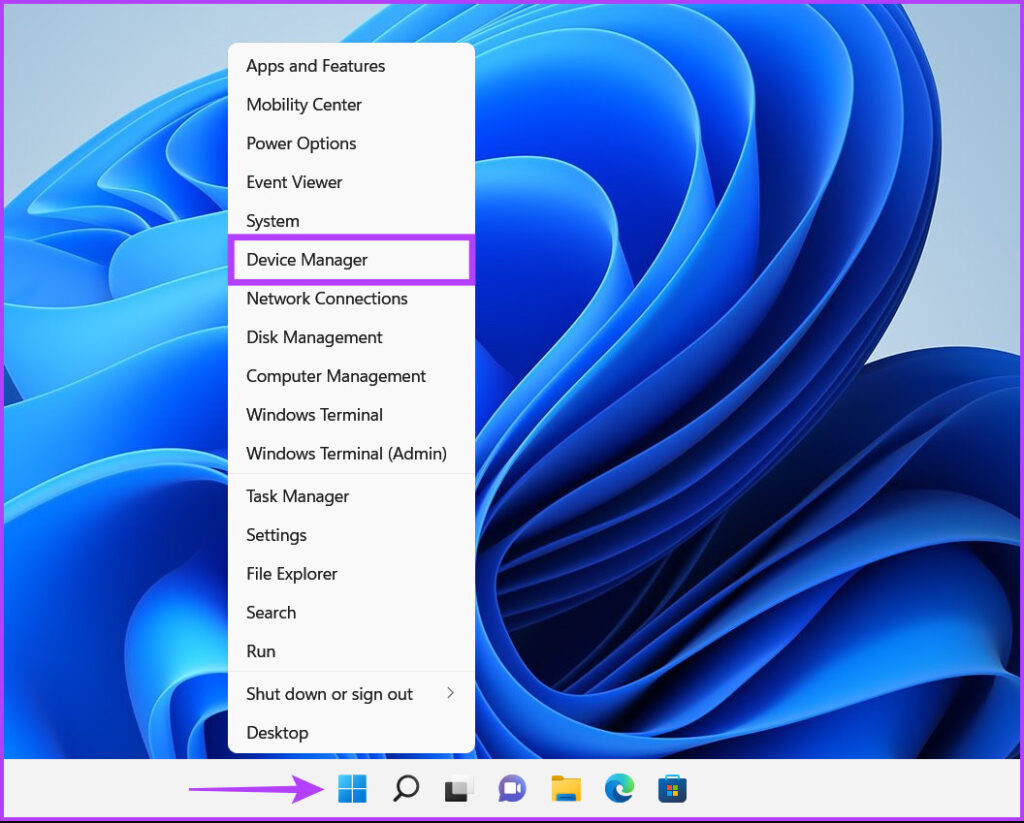
Step 1: Right-click the Start button and select Device Manager from the list.
Step 2: Look for the Keyboards option in the Device Manager window and double-click to expand it.

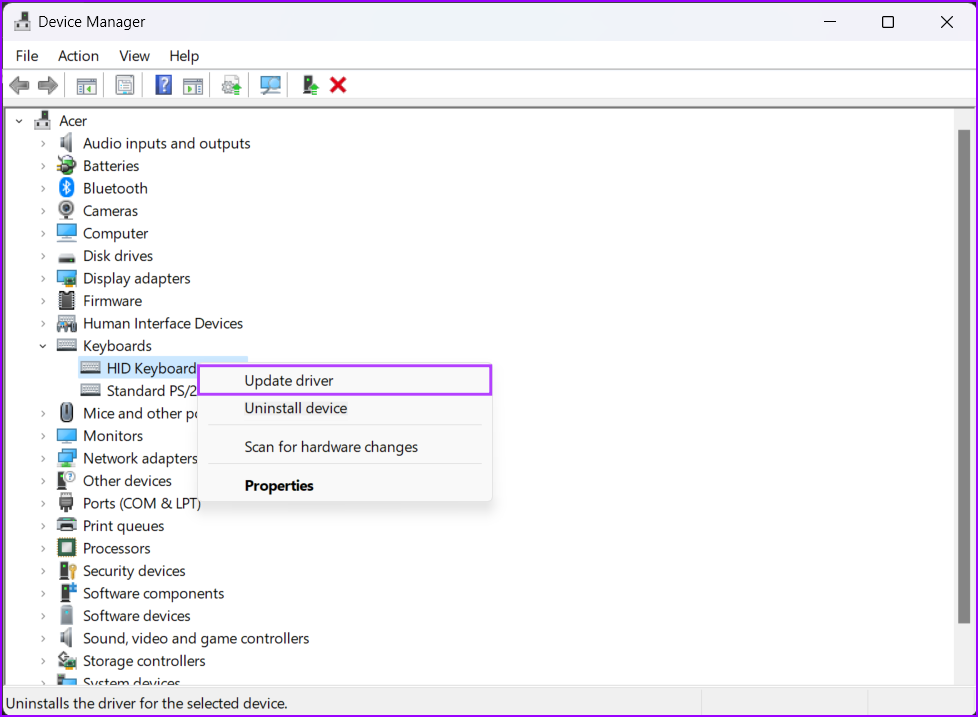
Step 3: Under Keyboards, right-click on ‘HID Keyboard Device’ and select ‘Update Driver.’
Step 4: On the Update Drivers window, click on ‘Search automatically for drivers.’
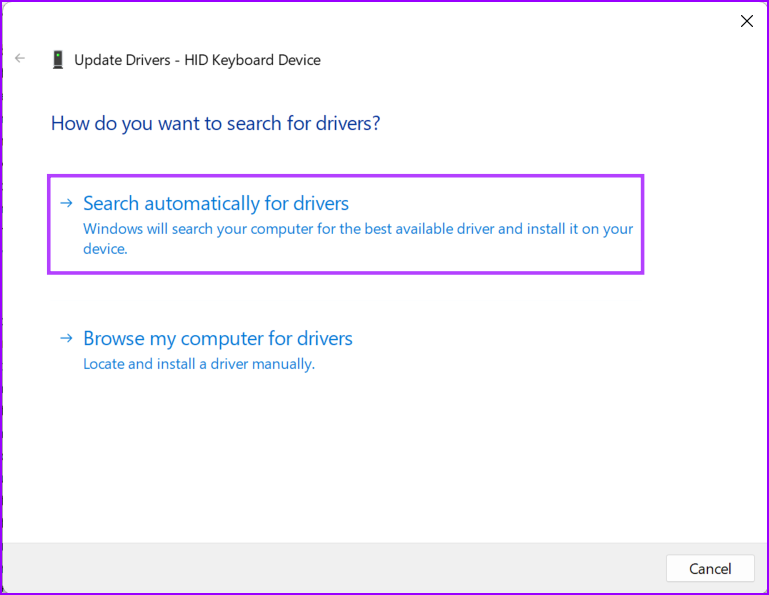
Step 5: Let it search for the latest drivers verified by Microsoft for your keyboard. It will find and install the latest drivers, if available. Otherwise, click on the Close button in the bottom-right corner.
You click on ‘Search for new drivers through the Windows Update’ option. Else, you can check the keyboard manufacturer’s website for the latest drivers.

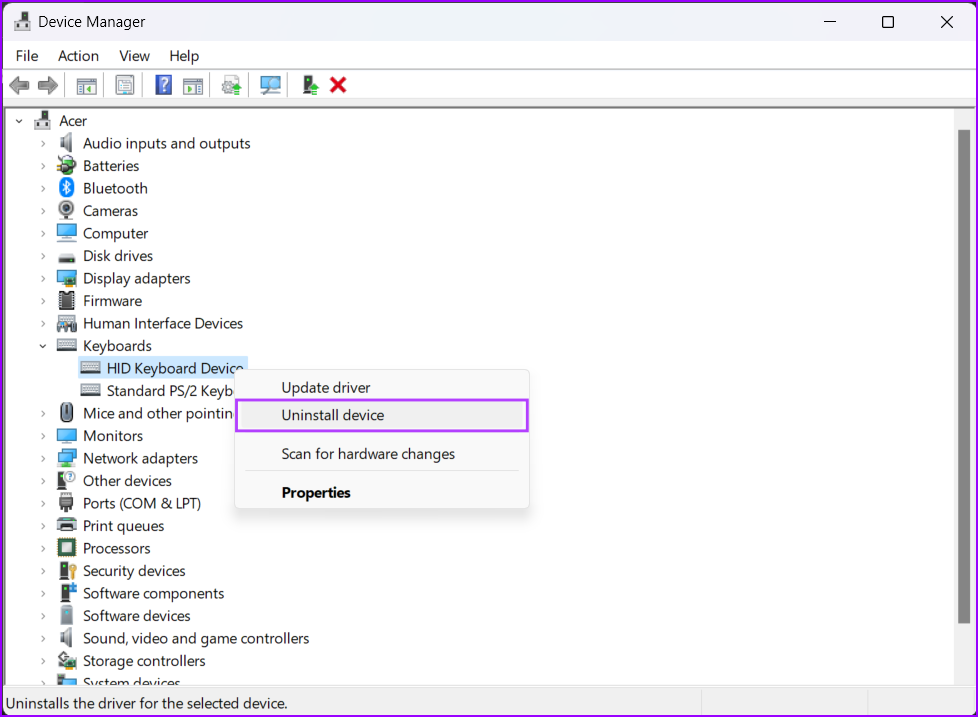
Step 6: If you can’t find any new drivers for the keyboard, right-click on ‘HID Keyboard Device’ and select ‘Uninstall device.’
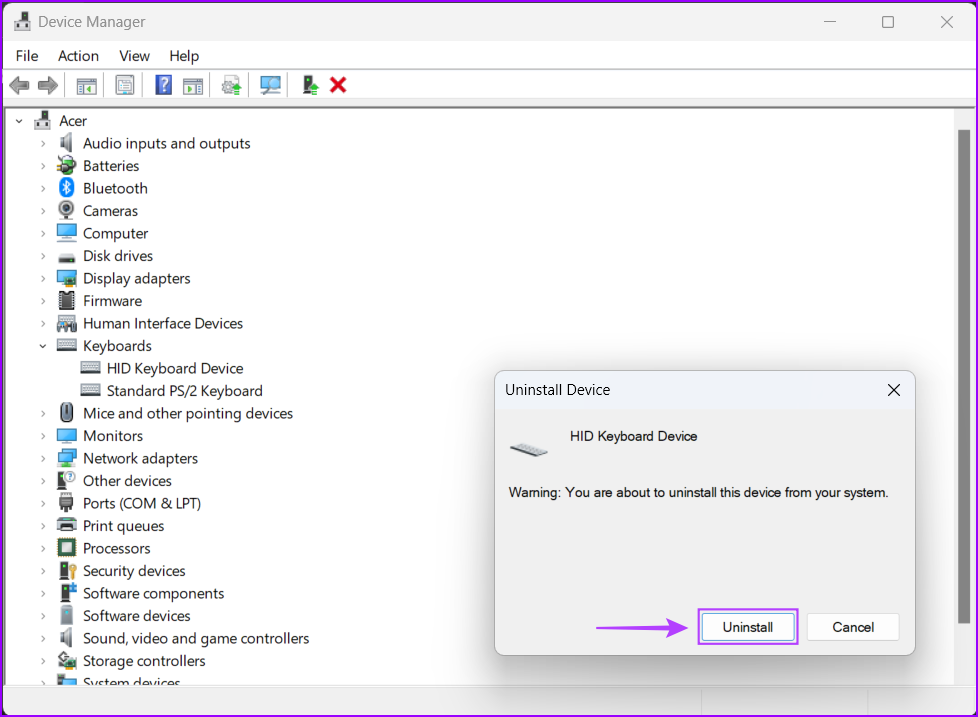
Step 7: In the confirmation dialog that appears, click on Uninstall.
Restart your PC and Windows 11 will automatically search for the relevant keyboard drivers and install them for you.
5. Run SFC and DISM Scan
You can quickly run an SFC (System File Checker) scan followed by a DISM (Deployment Image Servicing and Management) scan to detect and fix the corrupt files on your PC as detailed in the steps below:
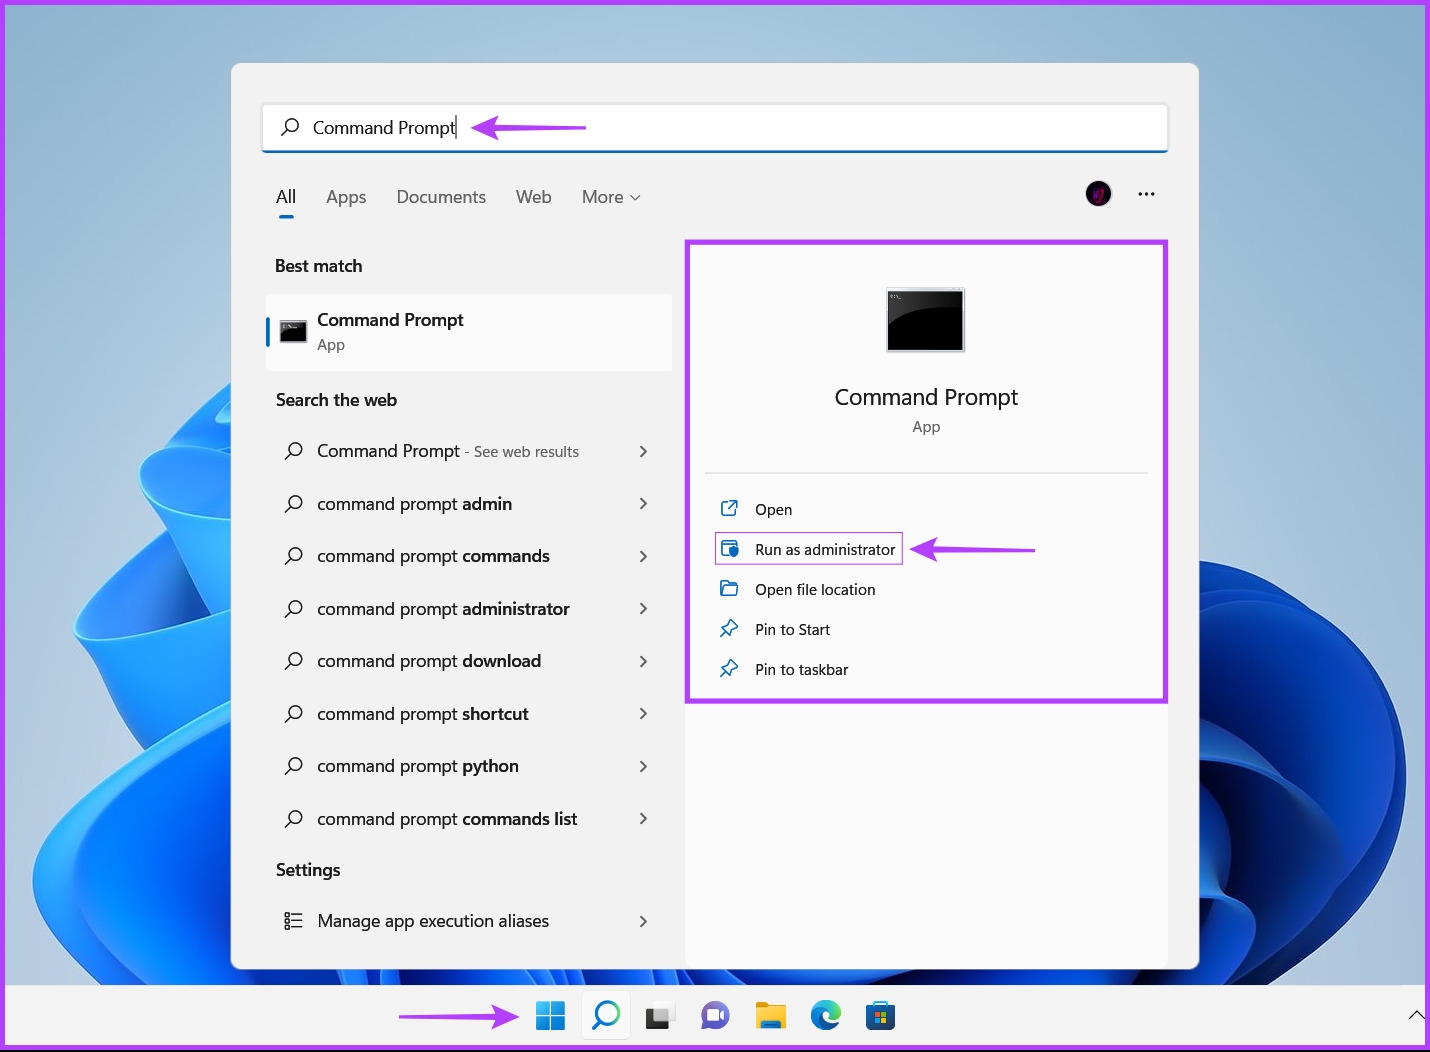
Step 1: Press the Windows + S keys and type Command Prompt. Then, from the results for Command Prompt, click on ‘Run as administrator.’
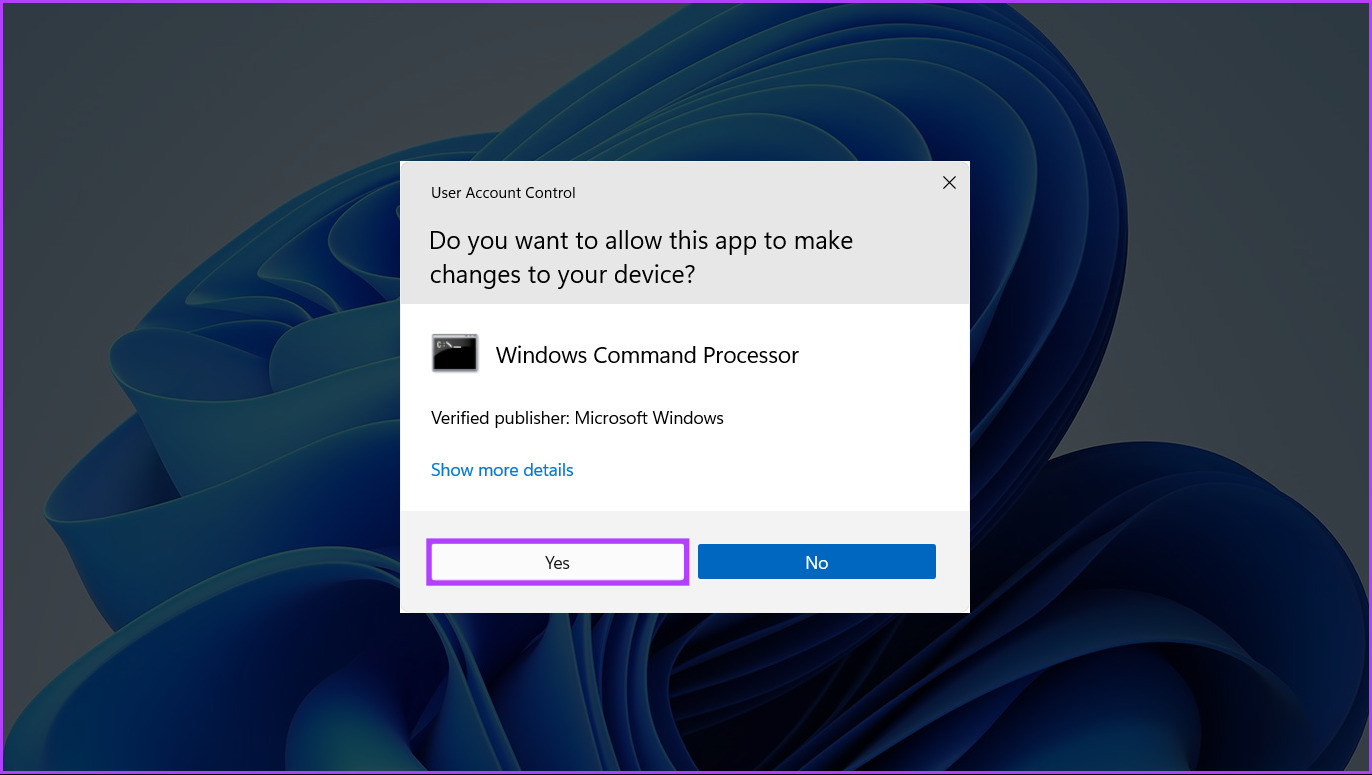
Step 2: Click on Yes when a User Account Control (UAC) prompt appears on the screen.
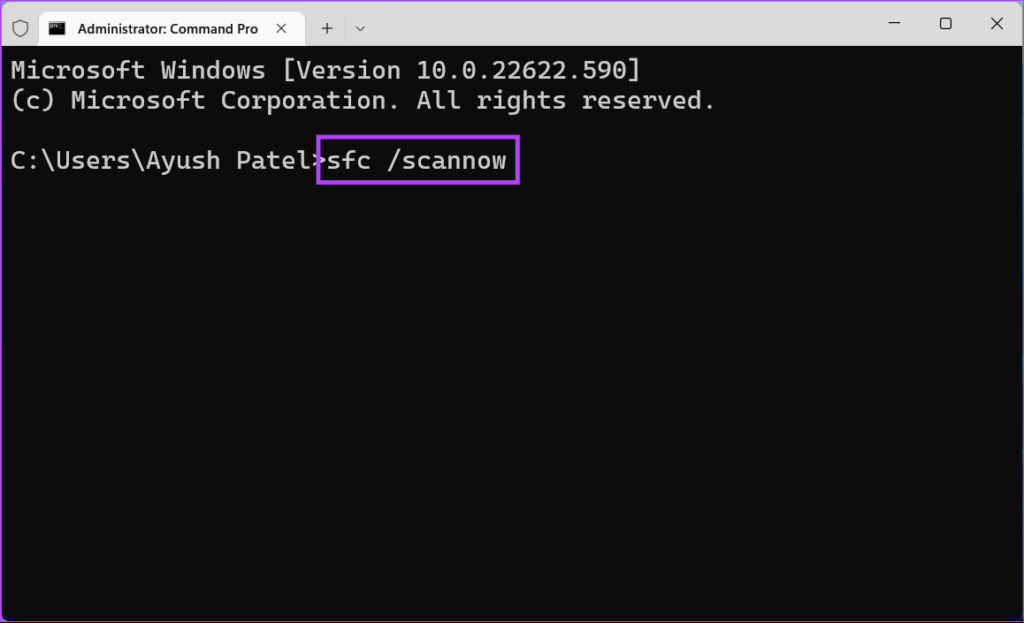
Step 3: Type the following command into the Terminal window and press Enter:
SFC /scannow
This command instructs Windows to scan for corrupted DLL (Dynamic Link Libraries) and other vital system files on your PC. Furthermore, running this command replaces the broken system files with functioning ones if any corruption is detected.
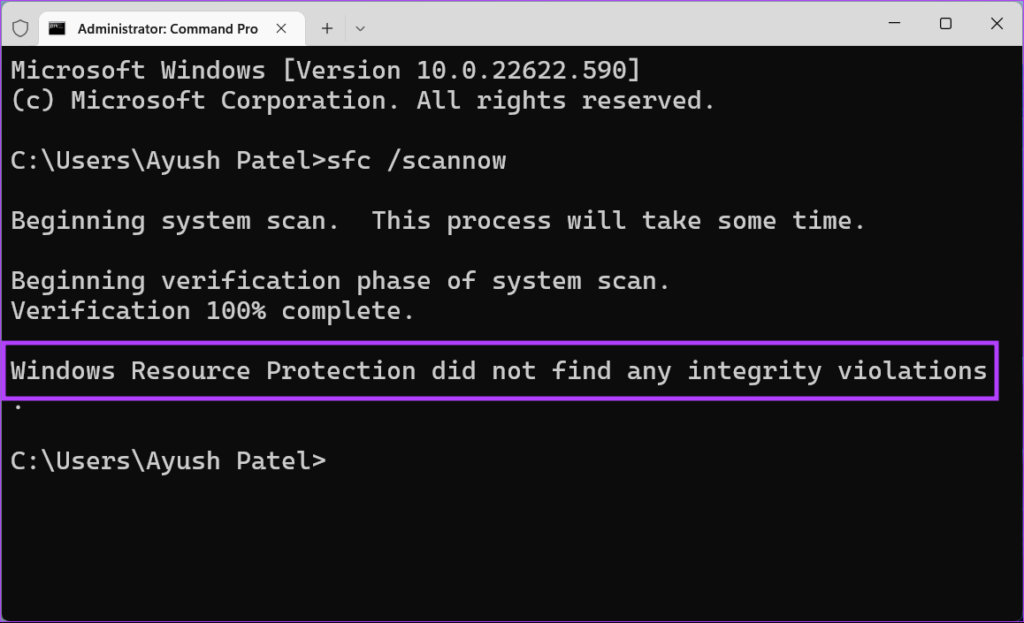
After the SFC (System File Checker) scan completes scanning your PC, you’ll see a message indicating whether or not it found any problems that need fixing.
If the SFC scan didn’t find any issues, you would get a message saying, ‘Windows Resource Protection did not find any integrity violations.’ However, if any issues relating to corrupted configuration files are discovered, it will automatically repair them for you.
Step 4: Run a DISM (Deployment Image Servicing and Management) scan once you have completed the SFC scan.
The DISM command scans for corruption and repairs issues with the operating system. DISM also scans the recovery and boot sectors for corruption and restores the resiliency of files if any corruption is detected.
To perform a DISM scan on your PC, execute all the commands listed below one command at a time by copying and pasting them into Command Prompt and pressing the Enter key.
DISM /Online /Cleanup-Image /CheckHealth
DISM /Online /Cleanup-Image /ScanHealth
DISM /Online /Cleanup-Image /RestoreHealth
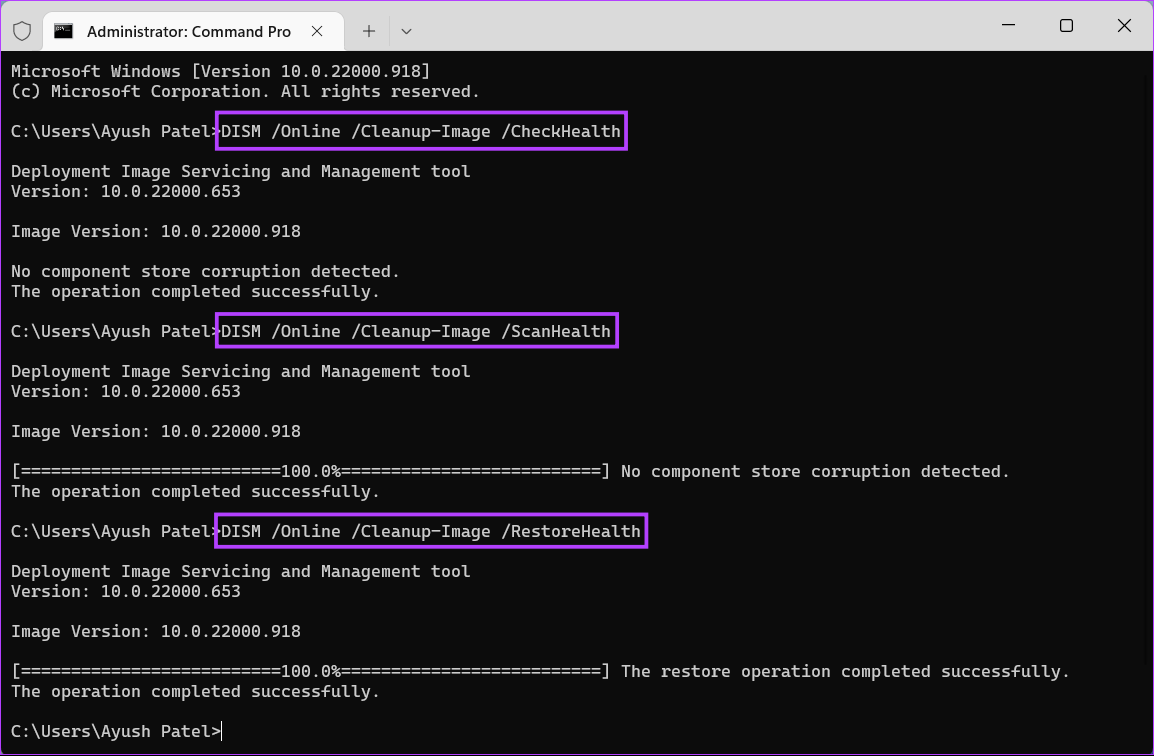
This DISM scan might take some time. Restart your PC after completing both scans to see if it helps to fix your issues.
6. Use System Restore
There’s a chance that you might be encountering issues on your PC because you accidentally changed critical system settings or installed an unstable app. However, you can quickly reverse such changes and fix most problems on your PC by performing a System Restore.
Do note that you can’t use this method if System Restore is not enabled on your PC. To enable System Restore on your PC, check our guide on using System Restore on Windows 11.
Here’s how you can perform a System Restore on your Windows 11 PC:
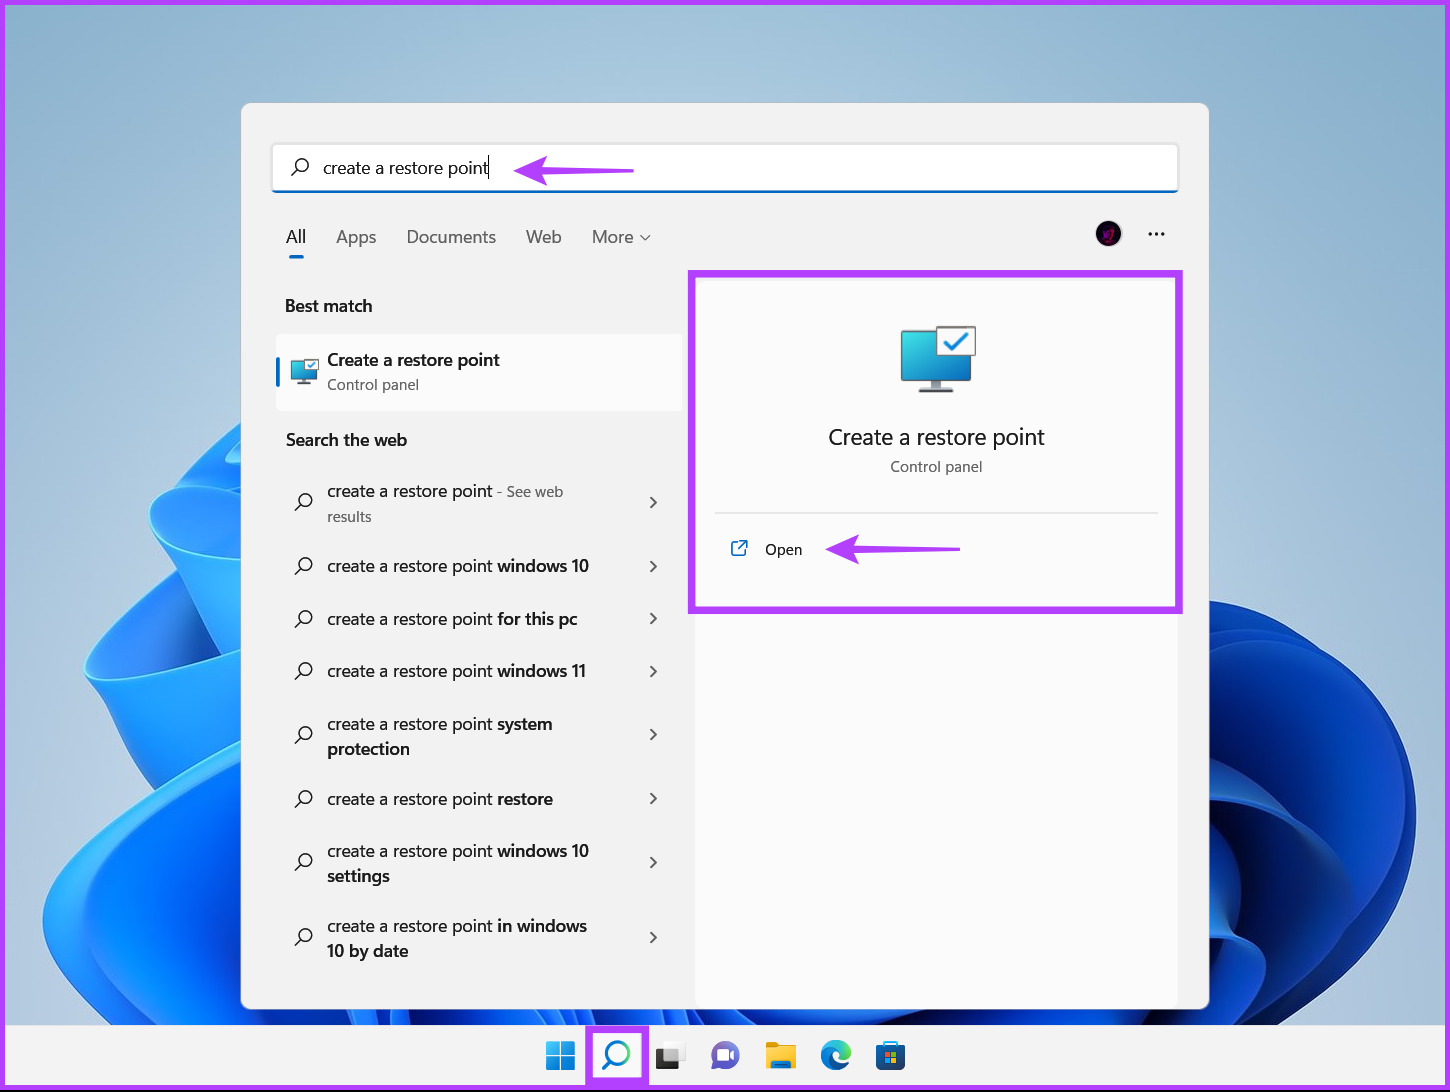
Step 1: Click the Windows Search icon on the Taskbar and type Create a restore point. Then, select the Open button below the search result.
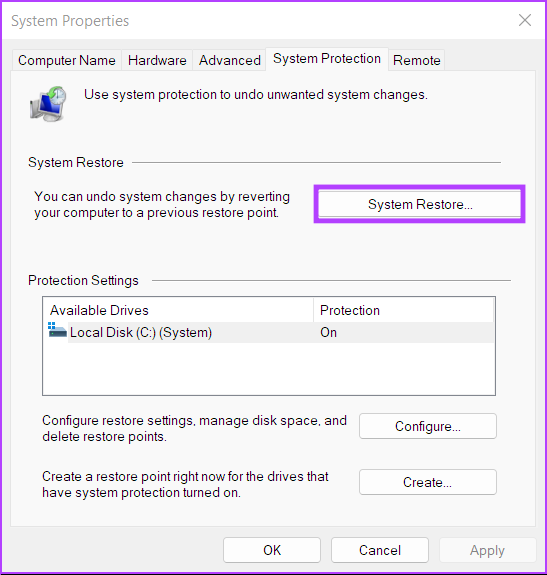
Step 2: When a System Properties window appears on the screen, click on the System Restore.
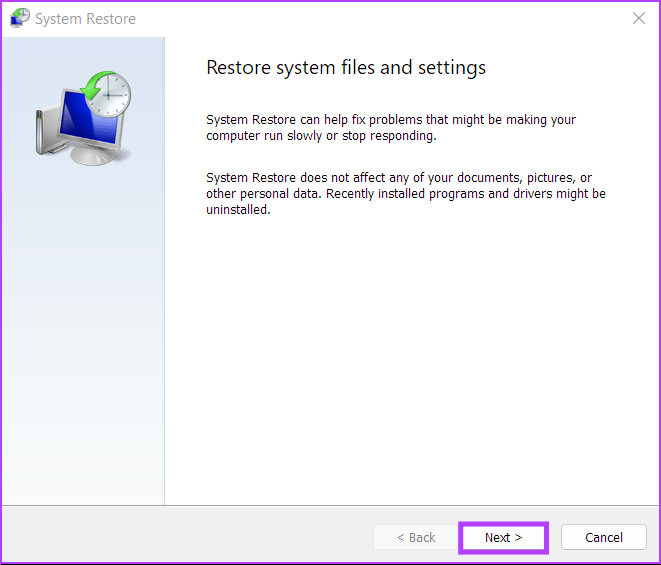
Step 3: Click Next to commence the restoration process.
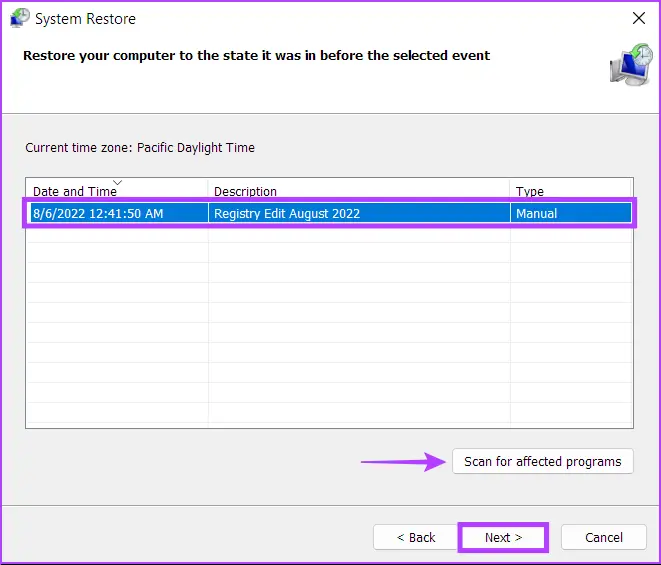
Step 4: Select a restore point you want to use. If required, click on Scan for affected programs to see the changes made to the system before the restore point was created. Then, click Next.
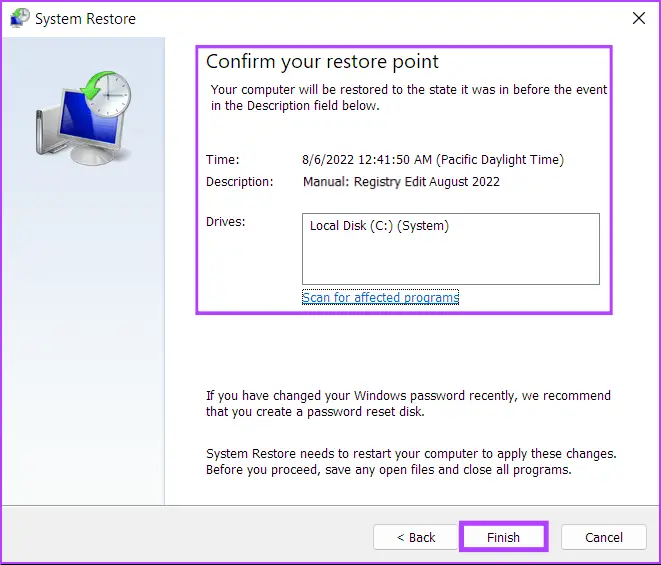
Step 5: Confirm the restore point to which you want to revert your system. After verifying it, click on Finish to commence the automated restoration process.
Fix Ctrl-Alt-Delete on Windows 11
The solutions mentioned above will help you fix the Ctrl-Alt-Delete shortcut on your Windows 11 computer. You can then use it to access the Task Manager instantly, switch user accounts, lock your PC, and more.